Mini Brig Project
INTRODUCTION
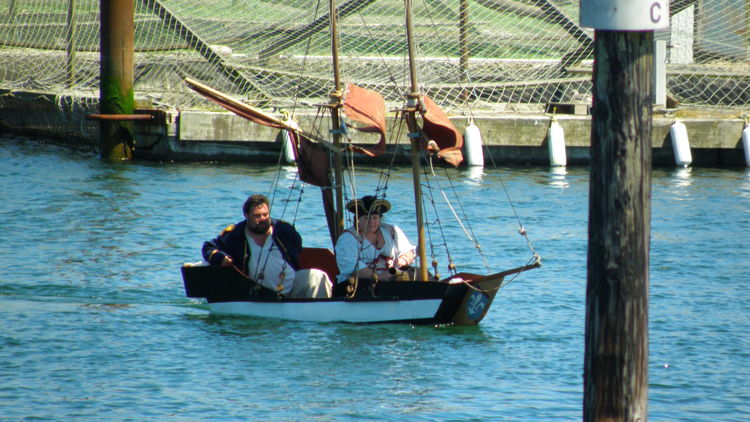
 The purpose of the mini-brig project is to provide an inexpensive, fun, and feasible means of sailing a small scale square rigger, and engage in mock naval combat. In addition, a small size would make the vessel easily transportable to inland lakes and festivals.
The need for something small, portable and inexpensive had to be critical in the design. It was also imporant that it was a functional sailboat, complete with a traditional square rig.
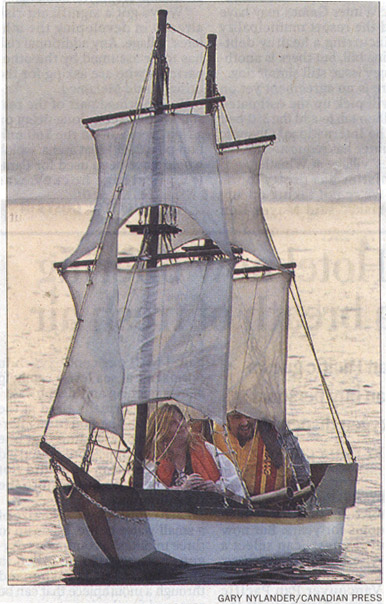
As a Sea Scout in Richmond, I remembered a group that had a small fleet of mini "tall ships" based on a Sabot design. The ships were about 8ft in length and used to frequent the Vancouver Sea Festival. They had black powder cannons (basically a copper tube) and even a small sea-monster that would "attack" only to be repulsed by the gallant fleet. They were known as Sabot brigantines and was originally the creation of Les Alfreds of the Jibset sailing school and were operated by the Vancouver Small Ship Society. In the mid-1990's the Vancouver Sea Festival met it's demise and with it, the Brigantines disappeared.
A good article was written by one of the surviving members about the Sabot Brigantines appeared in Duckworks Magazine in April, 2005.
When this project began in 2004, there were no extant plans and as a result, the mini brigantine/galleon had to be designed from scratch, complete with sails, rigging and cannon. The following information contains plans to build such a vessel, and four miniature carbide cannons. The first mini-brig built using this design was the "Adventure" which launched in May, 2005.
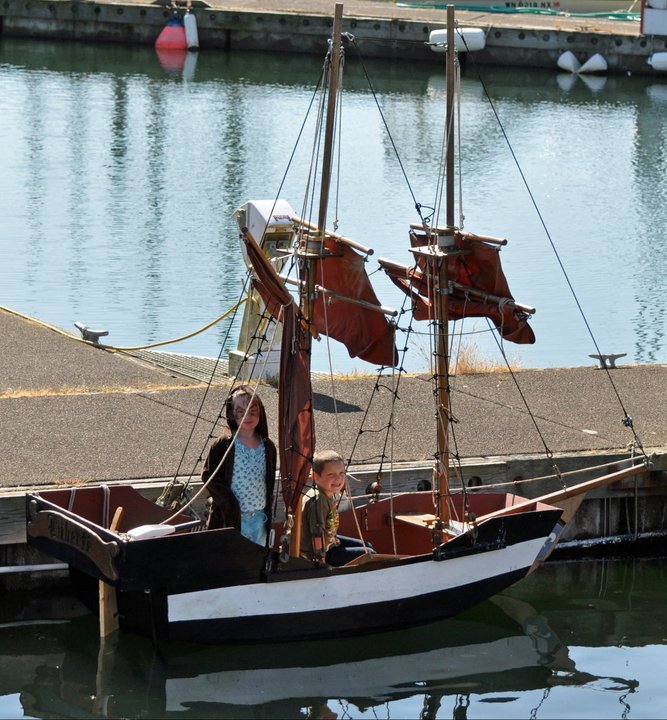
The estimated construction costs are about $500 CDN / $400 U.S. per vessel and can be finished over several weekends. Each Shady Isle Mini-Brig is capable of carrying two adults.
The Mini-Brig Story:
The first mini-brig of this design was launched in time for the Kelowna, B.C. centennial celebration, on a cold rainy night, in May 2005. It successfully navigated Okanagan Lake, and sailed for the first time (even though the pintels for the rudder had not arrived) - it was powered by the small electric motor.
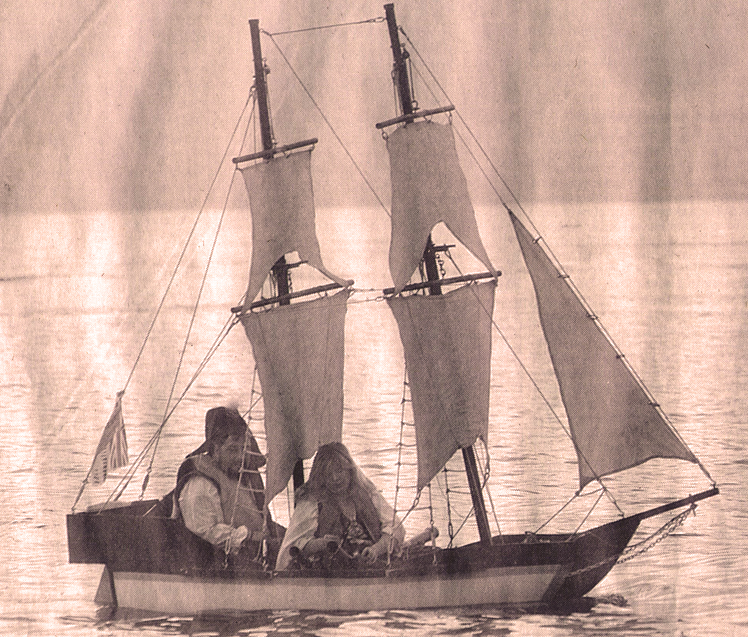
Later that year, we were invited to the 2005 Rusty Scupper Pirate Daze in Westport Washington, to battle the "short ships" name Ariel and Anne-Marie that were replicas of the HMS Barbados, that had been designed and sailed by Wayne Tedder. This was the first time in the ocean, and it meant trailering the brigs some 1,000 miles (round-trip) from the Okanagan. The mini-brig Adventure successfully made the journey. It was quickly learned the high-winds and tides meant some changes were necessary in the power and rigging design. Small modifications were made and she has been reappearing ever since, making it's 10th appearance at the festival in 2017.
A sister ship, the Liberte, was completed in 2007, and was featured with the Adventure, and in an article in No Quarter Given Magazine, in 2008.
The arrival of the Adventure in Westport, W.A. encouraged several locals to develop their own version of the mini-brig.
Wayne Tedder and Derek Litterer designed and lead the building of a larger flatbottomed version of the mini-brig. As part of the high-school graduation requirements several of these "Westport" versions were built for use by the Rusty Scupper Pirate Daze by local families. They were launched for Pirate Daze in 2007. These brigs have been a part of the Rusty Scupper Pirate Daze for the past ten years.
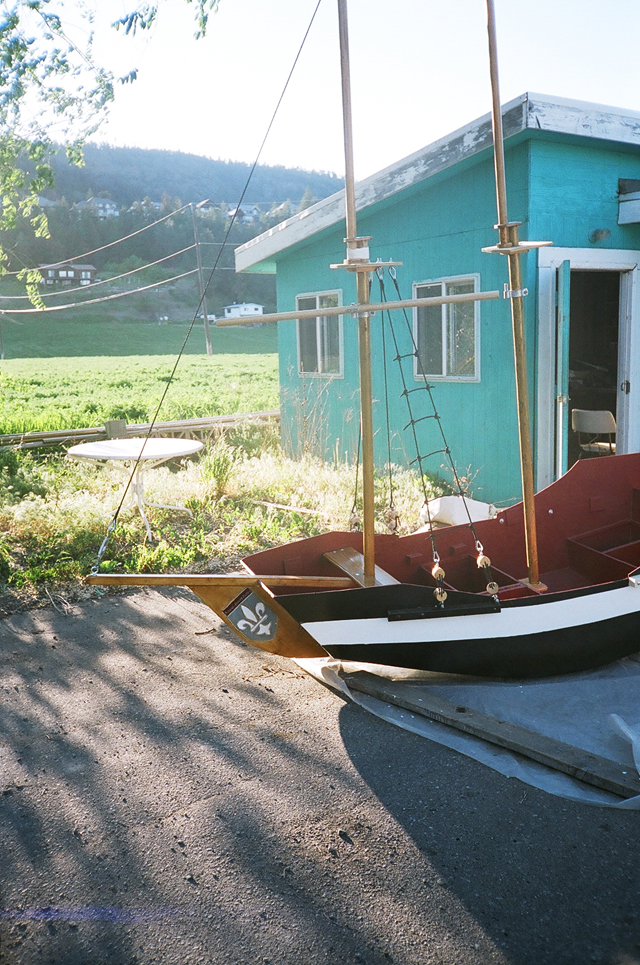
Our version of the "Pram-style" mini-brig has made appearances in countless different festivals over the years, and many modifications have been made. These are the original plans, from which the Adventure was built in 2005.
We offer the plans for a nominal fee of $24.95 that gives a license to build one hull. The plans are provided on an "as-is" basis. You can download the plans by accessing our webstore at:
http://shadyislepirates.com/OpenCart/mini-brig-plan-set

![]()
We currently operate on a non-profit basis. That is, any proceeds from the distribution of these plans are put back into the operation of these vessels and to charitable organizations. It will help facilitate the building of these small ships, and allow us to distribute these plans to others, to put on demonstrations, meets and other events. We welcome any input you may have as to furthering the design, and would gladly add any pictures of your brigs to a brig registry, so others can see your creations..
The Disclaimer
By building one Mini-Brig using the methods/plans contained herein, you agree to hold harmless the author for any damages caused by the use and/or misuse of the device/boat. There are no warranties expressed or implied that this boat is fit for any purpose. THESE PLANS MAY CONTAIN ERRORS.
By proceeding to build such a boat you do so at your own risk.
The author/designer Brian Nix limits the use of the plans for personal uses only. One hull per plan set. Any commercial reproduction or mass production is strictly prohibited.
Please make sure to give credit where credit is due. Alot of hardwork and dedication has been put into these brigs over the years, and we have provided these plans for your own personal enjoyment.
We ask that you please reference that the design came from Brian Nix of the Shady Isle Pirates when asked.
Mini-Brig Project: Design Overview
Mini-Brig Design Overview

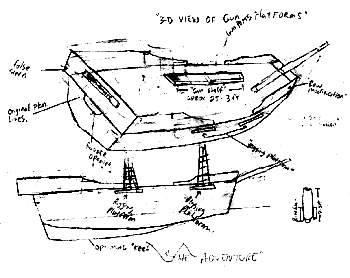
The Brigantine is 7'10" LOW, and features two masts. It generally operated by a captain and a gunnery crew. It is loosely based on the Mertens-Goosens/Sabot/Optimist Pram type of boat, and is assembled using "stitch & glue" construction.
Mini-Brig Design Overview:
 Click Image To Enlarge |
|
|
 Click Image to Enlarge |
 Click Image To Enlarge |
 Click Image To Enlarge |
 Click To Enlarge |
 Click To Enlarge |
 Click To Enlarge |

Below is a list of all the .jpg / .pdf plan sheets for this project:
Frame/Hull Plans:
minibrig1. jpg / minibrig1.pdf
minibrig2.jpg / minibrig2.pdf
minibrig3.jpg / miniBrig3.pdf
Broadsideview.jpg / Broadsideview.pdf
Maststep Location.jpg / Maststep Location.pdf
Cannon Deck.jpg / Cannon Deck.pdf
Daggerboard Casing: Type1.jpg / Daggerboard Casing: Type1.pdf
daggerboardtrunk2.JPG / daggerboardtrunk2.pdf
Rudder Plan.jpg / Rudder Plan.pdf
Bow Seat Plan (Port) .jpg / Bow Seat Plan (Port) .pdf
Bow Seat Plan (Starboard) .jpg / Bow Seat Plan (Starboard) .pdf
minibrigframe.pdf (Free Plans)
minibrigpanel.pdf (Free Plans)
Wooden Mast Plans
rigplat1.JPG / rigplat1.pdf
rigplat2.JPG / rigplat2.pdf
topmaststep.JPG / topmaststep.pdf
maststep1.jpg / maststep1.pdf
masstep1b.jpg / masstep1b.pdf
fightingtop1.JPG
fightingtop2.JPG / fightingtop2.pdf
fightingtop4.jpg / fightingtop4.pdf
Rigging Diagrams/Plans
minibrigrig.pdf
minibrigrig2.pdf
minibrigrig3.pdf
minibrigrig4.pdf
minibrigrig5.pdf
minibrigrig1a.JPG / minibrigrig1a.pdf
minibrigrig2a.JPG / minibrigrig2a.pdf
minibrigrig3a.jpg / minibrigrig3a.pdf
minibrigrig4a.JPG
minibrigrig5a.JPG / minibrigrig5a.pdf
minibrigrig6a.jpg / minibrigrig6a.pdf
lines2.jpg
lines2.pdf
minibrigsails.pdf
deadeye2.jpg
deadeye2.pdf
DeadEye.pdf
rigging.pdf
rigging2a.pdf
rigging3.pdf
sails.pdf
braceconnect.pdf
Mini-Brig Project: Hull Construction
Choosing Your Plywood:
All of the plans should fit on about two-three sheets of plywood. We used two sheets for the bottom and sides, and extra stuff (like our seat compartments in the brig Libertè), and one sheet for the ribs, stern, and bow. Remember to use thicker plywood for the frames. You will need other fittings like brass screws, glue, and adhesives which we will get to later.
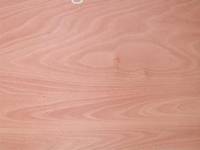
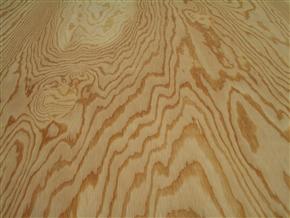
When buying plywood from your local Home Depot, Rona, Lowes or other wood supplier, you might have noticed that all the plywood is "graded". The most common plywood grading scheme is from A to D, with A being the highest quality with zero blemishes and great sanding, and D being the worst with the greatest number of blemishes (allowed).
Grading also typically comes in pairs where each grade addresses a different side or “face” of the stock piece, ie one letter will address the quality issues of the front face and the second, the side opposite to the face. So for instance, an A-C plywood sheet would be highly finished on the front face with a relatively poorer finish on the back. Similarly, construction grade C-D (referred to as CDX) plywood, is great for structural use but not for projects requiring a high quality finish and durability such as a brig.
.jpg)
Plywood is also available in different types. The best wood for boat building is considered by most to be Marine Plywood. However, Marine Plywood also carries a high price tag. The brigs are generally dry-stored. That is, they are not moored continually in a wet environment. If you plan on leaving your boat in the water, or do not have a sheltered place in which to store your boat, then marine plywood may increase your boats durability. However, that being said, any boat if not properly maintained, and left to the elements or exposed to lengthy periods of moisture will eventually rot.
In general, your boat will need regular maintenance, and periodic refinishing regardless of the materials used to build the boat. The better the materials, in theory, the less maintenance it should require and the better it should hold up against weathering.
Marine Plywood:
Most Marine Plywood is usually manufactured from selected Okoume, Poplar and other tropical hardwoods, such as Sapele Mahogany. There are also some domestic varieties of Marine Plywood manufactured from Baltic-Birch, Douglas-Fir and Larch. The best Marine Plywood effectively meets the requirements of the British Standard (BS) which specifies plywood should in its natural state, possess a minimum degree of durability against attachment by wood-destroying fungi. The most common rating is BS 1088, and is generally accepted as the international standard for Marine Plywood.
 Tolko Forest Products® is one of the best manufacturers of Marine Plywood.They are located in Canada, in the heart of the British Columbia. Tolko's AA Marine Grade Plywood features exterior waterproof glue and premium construction of Western Larch or Douglas-fir.
There are also some plywoods available that are not called "marine plywood", but use marine in the description. These plywoods are made from wood that is other than those listed in the marine standard. These woods may be suitable for building this type of boat, but they may not meet the BS 1088 standards. If selecting this wood, be careful of the treatments used on the wood, as this may jeopardize the bonding of paints, glue and resins.
Another type of fairly weather resistant plywood, and commonly referred to as "marine" grade plywood, is pressure treated plywood. Pressure-treated plywood, often called "Wolmanized" or P.T. plywood, is NOT "Marine grade" plywood, and those designations do not make the two products arbitrarily interchangeable.
Pressure treated plywood is common plywood that has been subjected to pressure treatment with chemicals to prevent the wood from decaying, or rotting. While pressure treated plywood may seem like a good boat building material, is often heavily warped. This is primarily the result of the high temperature and rapid moisture take up during processing. Some plywood delaminates during the process. In addition, some pressure treating methods incorporate water repellent materials. These materials can easily jeopardize bonding so you won't be able to glue or paint the plywood successfully. It is best to avoid pressure treated plywood for this project.
On hulls that do not have to be the lightest weight, I would choose Douglas-fir Marine Plywood over Okoume. It is stronger and more rot resistant than Okoume. However, as younger trees are being used to produced the plywood, there are often more patches and knots and Douglas-fir is becoming increasingly difficult to find in the higher grades. Depending on availability, you may have to settle for an AC or BB graded wood when using Douglas-fir. By contrast, Okume generally has a better overall appearance and is more abundant in higher grades, AA, and AB.
Examples of BS-1088 Marine Plywood


Douglas Fir Okoume Sapele Mahogany
Where to find Marine Plywood:
![]() Windsor Plywood - the initial concept, which started in North Vancouver in 1969, was to create a specialty plywood warehouse which would bring stock closer to the contractors in the area and serve home owners and do-it-yourselfers. The marketing plan at that time, as it is today, is to specialize in hard to source interior and exterior home finishing products including flooring, doors, and mouldings. Today, Windor Plywood supplies high quality products and supports our local communities.Windsor Plywood has been a part of the growth of communities in Western and Central Canada and the Northwest United States for over 40 years.
Windsor Plywood - the initial concept, which started in North Vancouver in 1969, was to create a specialty plywood warehouse which would bring stock closer to the contractors in the area and serve home owners and do-it-yourselfers. The marketing plan at that time, as it is today, is to specialize in hard to source interior and exterior home finishing products including flooring, doors, and mouldings. Today, Windor Plywood supplies high quality products and supports our local communities.Windsor Plywood has been a part of the growth of communities in Western and Central Canada and the Northwest United States for over 40 years.
![]() Homestead Hardwoods - Established in 1981, Homestead Hardwoods is located 10 miles west of Sandusky, Ohio near the shores of Lake Erie. They supply yacht, house boat and pleasure craft manufacturers and restorers locally and from around the country with high quality boat lumber and marine grade plywoods. They will ship to any location in the U.S.A. or Canada
Homestead Hardwoods - Established in 1981, Homestead Hardwoods is located 10 miles west of Sandusky, Ohio near the shores of Lake Erie. They supply yacht, house boat and pleasure craft manufacturers and restorers locally and from around the country with high quality boat lumber and marine grade plywoods. They will ship to any location in the U.S.A. or Canada
Other Plywoods:
There are many other choices of plywoods besides Marine Plywood that can be used for boat building. The main advantage to using such a plywood is cost. However, this may also sacrafice durability - generally nothing beats the best Marine Plywood. However, if carefully selected, certain types and grades of plywood can give reasonable results at a lower cost.
 Radiata Pine: Radiata pine is classed as a medium-density softwood, the biggest problem with pine, is that it can be very soft, which causes it to absorb alot more epoxy, resins, and paint. Radiata pine is known as "clearwood", wood that is free of defects such as knots, holes or other blemishes and is one of the world's best clearwoods. Radiata pine is one of the world's most widely planted plantation species and has the ability to grow to a large diameter faster than almost any other tree species. Some of the best Radiata pine comes from New Zealand, and South America (Chile).
Where to find:
![]() The Home Depot sells Araucos® Radiata Pine, manufactured in Chile from 100% Sustainable Plantation Forests. Araucos Radiata Pine Plywood is produced under the tightest grading specifications. AraucoPly ACX grade panels allow a maximum of 6 wood repairs and 6 synthetic repairs on the face, making them suitable for a wide variety of interior and exterior applications. Meets and Exceeds PS-195 U.S. Product Standards and they use a composed core manufacturing process in which the interior core veneers are composed together prior to pressing, creating a dramatically improved core. This allows for exceptional dimensional stability, and minimizes the ability for warping.
The Home Depot sells Araucos® Radiata Pine, manufactured in Chile from 100% Sustainable Plantation Forests. Araucos Radiata Pine Plywood is produced under the tightest grading specifications. AraucoPly ACX grade panels allow a maximum of 6 wood repairs and 6 synthetic repairs on the face, making them suitable for a wide variety of interior and exterior applications. Meets and Exceeds PS-195 U.S. Product Standards and they use a composed core manufacturing process in which the interior core veneers are composed together prior to pressing, creating a dramatically improved core. This allows for exceptional dimensional stability, and minimizes the ability for warping.
 Weyerhaeuser®, a U.S. Company based in Washington State is now distributing through ilevel, Selex® Radiata Pine. It is a plywood that is sanded to a fine, smooth finish. The A-grade faces of the panels have an outstanding appearance free of knots and holes, while the C-grade faces have only minimal natural defects (not greater than 40 millimeters wide). It is generally manufactured from radiata pine grown on managed plantations in Chile, that are third party certified for sustainability to the Programme for the Endorsement of Forest Certification standard.
 Lauan Plywood, also known as Laun, "meranti" or Phillipine Mahogany is made from trees in the "Shorea" family. Manufacturers create veneer from these trees, which are typically either White Lauan (created from Shorea almon) or Red Lauan (from Shorea negrosensis), and this veneer is glued together in layers to make the plywood.
Because of the softness of the wood, it is difficult to make Luan veneer completely free of voids and flaws. The surface layer is usually completely free of voids, but may have fills and patches. This means you may want to paint your Luan pieces. However, these flaws tend to be miniscule and they do not detract from the chief quality of the plywood.
Home centers and lumber retailers widely stock Lauan/meranti plywood in a variety of thicknesses
 AC/BC Grade Fir & Pine Plywood -
Some AC & BC graded fir and pine plywood may be suitable for boat building, but great care should be excercised in determining both the source of the material and where the plywood is milled. As milling techniques and technology can vary.
The better pine and fir comes from northern climates, such the Pacific Northwest, British Columbia, Yukon and Alaska. It is known as Western White Pine, and is manufactured from a variety of pines including, Lodgepole and Sugar pines. The better Western Pine is milled from second growth forest, which is slowly become scarce. It has a moderate resistance to rot and decay. There is also an Eastern White Pine, but this is not as well suited to the plywood production, as the trees are smaller and thus produce more imperfections in the wood.
Also available in some home centers is Southern yellow pine, it doesn't refer to any one species of tree, but rather a group of species which are classified as yellow pine (as opposed to white pine), and are native to the Southern United States. The most commonly produced plywood is made from Longleaf yellow pine. Originally, old growth Southern pine was much more rot resistant than fir, but that may not be true with the plantation grown pine now used for plywood.
These plywoods can produce mixed results, depending on how well the boat is maintained, the type of finish and how it is applied, and how the boat is stored. It is a continuing matter of debate amongst boat builders on the long-term savings of using economy plywood. But it seems to be a common consensus, that in some cases, particularly with smaller, dry stored boats, there is some merit and benefit.
A general rule of thumb in determining the quality of the wood is to count the laminations on the edge of the sheet. The more laminations, generally the better the quality of the plywood.

Layout and Cutting:
The first order of operation is to layout all the designs onto several sheets of plywood.
For our brigs we used BC grade Canadian milled Western White Pine to reduce costs of construction, and to support the local lumber industry. The ideal material is Marine Plywood which is stronger, and very mildew and rot resistant. Another alternative is Lauan, which is lighter than pine, but since weight is not generally a concern, as we trailer our "ship", the added cost versus the weight advantage of Lauan is negated. We also have covered dry storage, and are utilizing excellent paints and adhesives. You can get BC Pine relatively inexpensively from your local home supply center. You will want plywood that is 1/4" - 3/8" thick (we recommend 3/8") , with a little thicker pieces for the ribs, bow, and stern (1/2- 3/4").
We "transposed" the drawings full scale onto the plywood, by using a pencil, tape measure and straight edge. You may want to do a smaller "mock-up" using cardboard/pasteboard to make sure that you get all the measurements accurate. It may help to also print all the sheets from both the Mini-Brig plans.

Laying Out The Plans On the Plywood. It is handy to have a good straight-edge and a square
All of the plans should fit on about three sheets of plywood. We used two sheets for the bottom and sides, and extra stuff (like our seat compartments in the brig Libertè), and one sheet for the ribs, stern, and bow. Remember to use thicker plywood for the frames. You will need other fittings like brass screws, glue, and adhesives which we will get to later.
A stitch and glue vessel is very forgiving, but it does pay to pre-sand all the edges and true them up as much as possible. The more you sand them and fair up the edges before you assemble it, the less sanding and better product you will have later.
We cut everything using a simple handheld jigsaw by Black & Decker. In all the bulkheads we used a sheet of 5/8" to beef up the stern, bow and midsection etc. You can go thicker here if you want, and the only detriment is weight.

Comparing the cut bow & mid-seat frames to the dimensions on the plans.
NOTE: We did not need to print the plans actual size but worked off the 8 1/2 x 11" sheets
You can cut all the wood in the winter months, but will want to wait for at least room temperature heat for the resins to dry. It is suggested that if you do not have a heated garage, go ahead and sew up the sails during those cold winter months. You might also want to do some ropework ahead of time. You will find that spring will come much faster than you expect.

Double-checking the transom frame to the plans.
Mini-Brig Project: Hull Construction - Step 2
Stitching and Gluing:

All the boards are cut and ready for stitching and gluing.
Shown in the picture are the two sizes of caulking tubes available.
Make sure you have some good rubber/nitrile gloves as this
caulking can/will stain your skin for days.
Once we had cut all the boards, we stitched and glued them together. You can do this by using two different methods: stainless steel and brass screws to first attach the stern and then "stitching" the bow plate to the sides using galvanized wire. Alternatively, you can use plastic "zip ties". Each method has it's pros and cons:.
A.Wire Method:
Pros:
Small holes mean less filler. Easier to sand.
Cons:
Wire is a pain to work with.
Grinding the wire off once done is a pain
B .Zip Tie Method:
Pros:
Easy and quick to assemble
Easy to sand smooth
Con:
Drilling rather large holes
More filler is required
Step 1: Stitch/Attach Bow Plate
Attach the bow plate either using the wire or zip ties to the brig sides. This is done by drilling a couple holes on each side of the the bow plate and then corresponding holes in the each of the brig sides and then passing the wire or zip ties through the holes and then "stitching" them together.

Attaching the bow plate with wire

Attaching the bow plate using the zip tie method
Step 2: Stitch/Attach Stern Plate
In the same manner as the bow, attach the stern plate.

View of stern stitching (Note: extended at top to accomodate "brig" modification)
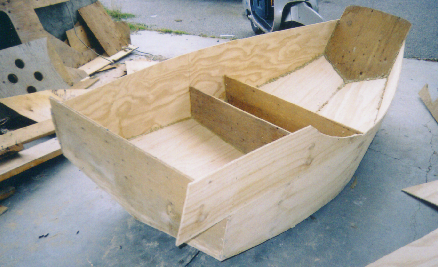
The bow and the stern, and brig sides should now resemble this shape:
_
/ \
/ __\
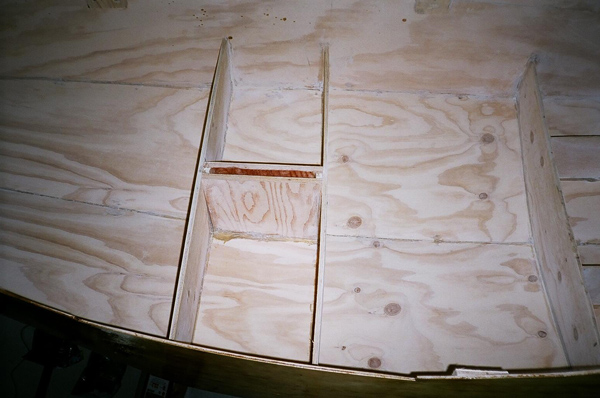
Step 3: Attach the mid-frames
Now it is time to attach the mid-frames. The first mid-frame you want to attach is the one closest to the bow (front). Thy are easiest to attach by using a small brass screw through the sides of the brig. It may help to have a friend as you will need to gently coax the frame into place. The sides of the boat should now start to bow outwards.

Attaching the mid-seat frame (bow side)
Once the mid-seat frame bow side is attached, you will now want to screw in the stern side midframe.

The boat should look like this with Bow plate, Stern plate and Mid-Frames attached.
Step 4: Attach the stern seat frame.
The final step is to now attach the stern seat frame into place. This completes the basic framework.

This is how the boat should look with all frames in place
Mini-Brig Project: Hull Construction - Step 3
Stitching and gluing the bottom:
Now that all the "frames" are in place, we stitched the bottom of the hull into place. You attach the sides and bottom with thickened epoxy glue. If you want to use epoxy it is available at: boatbuildercentral.com or
https://www.duckworks.com/supplies-s/254.htm at very reasonable prices.
However, instead of using epoxy to glue the panels in place we used Lepage's Bulldog Grip ® PL Premium Polyurethane adhesive.
This adhesive is water resistant, weatherproof and is sandable and paintable. At only $4/CDN per tube it is considerable less expensive than epoxy but not quite as strong. Make sure that you "fillet" all your joints with either epoxy or caulking before you tape.
A fillet is a continuous bead of thickened epoxy mixture or caulking glue applied to the angle created between two parts. It increases the surface area of the bond and serves as a structural adhesive and brace.
You can make a very very strong glue by adding a filler powder like wood flour or silica to epoxy.
Gluing plywood structures with epoxy fillets has become extremely popular because it allows extremely thin plywood panels to be bent into compound curves and temporarily stitched together at varying angles with plastic wire ties or copper wire that are then permanently joined together with epoxy fillet.
In order to make the epoxy thick enough for a fillet you will need to add a thickening agent like wood flour or anti-sag silica. When mixing in the thickener into the epoxy, you’re aiming for a mix the consistency of peanut butter, or slightly thicker if you haven’t been able to let the priming resin go tacky.
Filleting creates an effective glue joint that requires no fasteners of any kind and can result in a joint that is as strong as the parts being joined together.
If wood components have not previously been sealed in epoxy, it is good practice to apply a thin coat of epoxy to saturate the surface prior to applying the thickened epoxy fillet so the edges of the fillet don’t soak into the dry wood and cause a dry edge.
You can let the initial coat of epoxy cure, then sand it in preparation for applying the fillet; or you can allow the initial coat of epoxy to tack up a bit before applying the thick epoxy fillet; or you can wipe off uncured epoxy remaining on the surface with paper towel so the uncured epoxy does not cause the thickened epoxy to slide or slump. In this last scenario, by wiping off the remaining liquid uncured epoxy from the surface you can now apply the thickened epoxy fillet without it sliding off of the wet and uncured liquid epoxy.

A basic fillet

For more information on epoxy fillets take look here: https://epoxycraft.com/westsystem/better-than-new-epoxy-fillets/
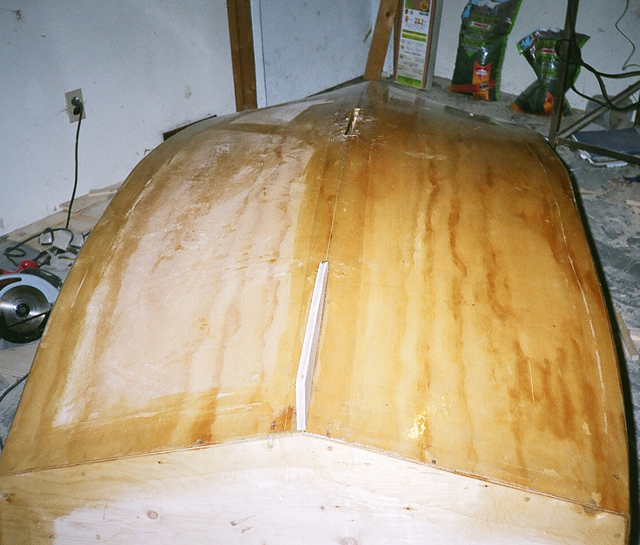
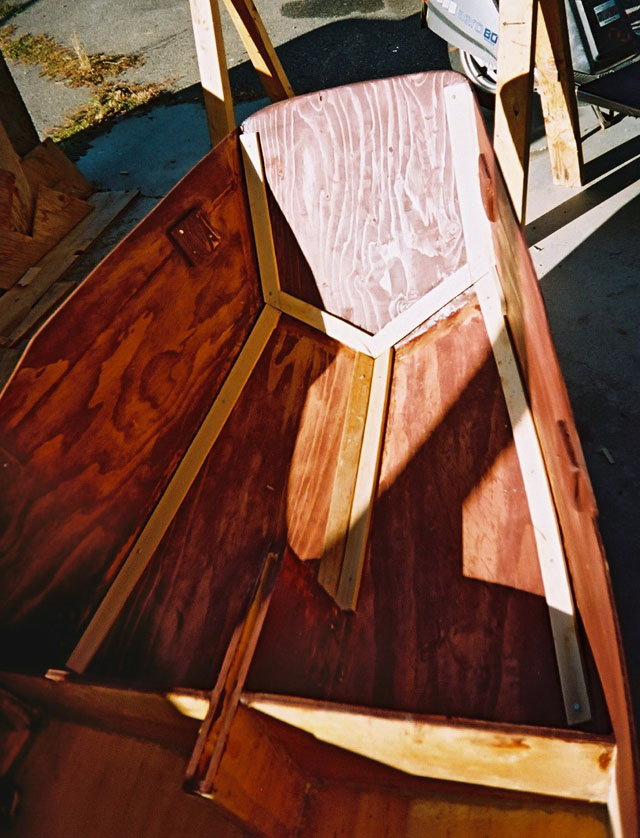
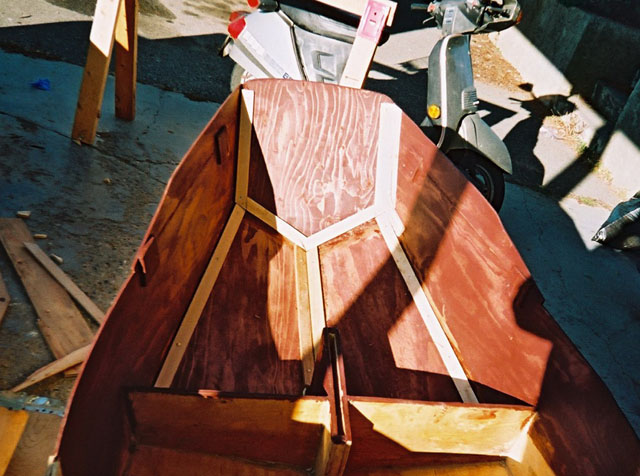
To attach the hull bottoms we flipped the boat up onto a pair of sawhorses and stitched the bottom in place using wires or zip ties. Once we wired the bottom in place and had the sides faired up, we filleted the inside and outside of the boat.
If you are planning on using the caulking to "glue" the hull and fillet. It should be mentioned that while the caulking should be liberally applied, it does expand. This caulking is particularly strong, and it could take alot of sanding to fair up - tedious dusty sanding!! It will save time if you have a trowel, or plastic applicators like you would use for putty/autobody work, to help smooth the caulking and remove excess material before it hardens, as you would an epoxy fillet.
Also, if this stuff if it gets on your hands is likely to stain them for days, and even weeks. In working with this particular caulking it is adviseable to use nitrile gloves. It will make cleanup alot easier. This caulking can only be removed by mineral spirits, so use clothes that you are willing to sacrifice. Once it dries on anything, it won't come off.. this is some tough adhesive!!

Bottom being stitched in place prior to gluing
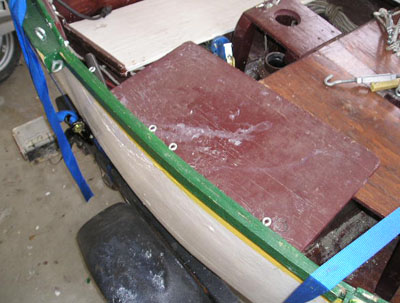
Attaching the Brig Sides
Once you have allowed the caulking to drive overnight, the next step is to flip the boat back over and attach the "brig" sides. We did this by attaching them to a 3" x 3" plywood panel placed on the inside of the hull. These panels also serve as reinforced"mounts" for the braces and sheet cleats. Once we screwed the "brig panels" into the "mounts" we reinforced the sides by caulking the seam. We later reinforce this with fibreglass tape, on the outside of the seam.
Once the caulking dries (24 hours),
attach the "brig" modified stern side by screwing it into the stern plate
and the 3" x 3" plywood "mounting" panels

This shows the inside of the brig sten sides attached
Once both stern sides are in place, then it is time to attch the "false" stern backing. This will help hide and propulsion devices and give the brig its character shape.

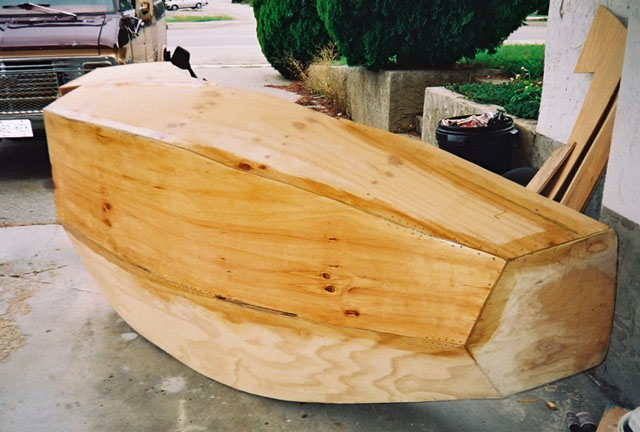
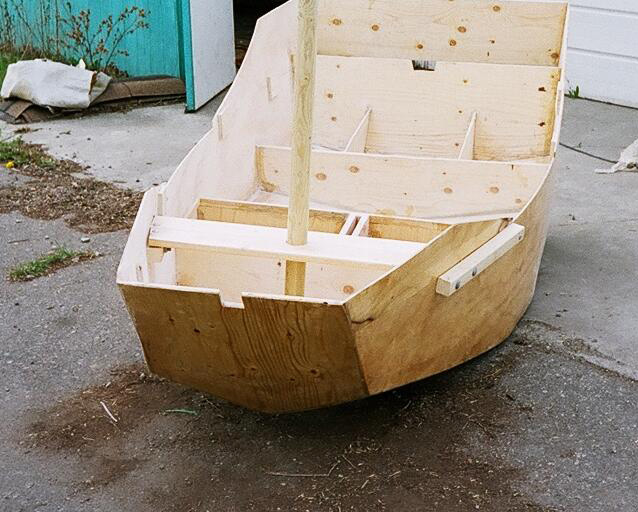
The brig with both sides and false stern attached.
We used a piece of 2" x 2" in each corner where the "false" stern meets the brig sides to help reinforce the joint. This can be cut the full length of the brig side and stern (approx 4" long), or cut down to allow "through" mounting of an eyebolt. These 2"x2" also serve as mounting points for rigging eyes...
.JPG)
2"x 2" Corner Reinforcement (Note this is full length)

Top-Down view on corner reinforcement (this is a 1/4 size length for through mounting)

Side-view showing eye-bolt

Another view of reinforcement
The final step is to attach the bow sides in the same fashion as the stern sides.

The stern attached and the bow brig sides.

Everything is in place. Ready for the next step!
Mini-Brig Project: Hull Construction - Step 4
Assembling and Fitting the Daggerboard Trunk Casing
Make sure that prior to placing the daggerboard trunk into the boat you have it assembled and have fully sealed the daggerboard trunk casing with the appropriate resins, reinforcing the seams with fibreglass tape.
There are two different plans/methods for the daggerboard trunk. One daggerboard trunk option is slightly wider and involves cutting through the mid-seat frame. The other design, is simply placed between the two frames. The advantage of placing the daggerboard slightly forward, is it allows for better upwind handling. The larger width, also means it is possible to slightly reduce the aspect, and therefore draw less water. The second option is easier to install, and allows for more forward legspace.
The downside to installing the trunk through the midseat frame is that it can be tricky, as it involves cutting out a small section out of the frame already in the hull for the trunk to pass through. In addition, it also takes up more room and leg space, although it can make a convienent forward seat
Both plans are included in the zip files - The first step in either option is to assemble the casing. However, before assembling and installing the daggerboard casing in either case is to select a resin system, and fibreglass cloth.
Choosing Your Resin
![]() The first thing you need to do is decide what type of resin/taping method you want to use on your hull. The good folks at Industrial Paint and Plastics were great in providing sound advice. These guys really provide great customer service and help, and have been instrumental in helping with previous projects over the years including a restoration of a 'Stratford style' Dory and a wooden Sabot.
The first thing you need to do is decide what type of resin/taping method you want to use on your hull. The good folks at Industrial Paint and Plastics were great in providing sound advice. These guys really provide great customer service and help, and have been instrumental in helping with previous projects over the years including a restoration of a 'Stratford style' Dory and a wooden Sabot.


Industrial Formulators', 51Cure is an epoxy system for people who are looking for the performance of popular epoxy systems that mix at 5 parts resin to one part hardener and want epoxy performance at a lower cost.
Industrial Formulators Inc. is one of the major suppliers of epoxies for industries like construction, electronics, marine, automotive, sporting goods, and hobbies. Their formulations have been used to solve problems and are used regularly in pulp mills, submarines, dams, museums, railroads, and research labs, along with more conventional uses like boat building.

There are several basic polyester resins on the market. While not as strong or as durable as epoxy it is considerably less expensive. Fibreglass resin generally comes in two types, waxed and un-waxed. We used the "unwaxed" variety for greater paint adherence. We used Industrial Paint and Plastics IP140 General Purpose resins which exhibits a moderate exotherm temperature and cure to allow for thicker laminate applications.
Choosing Your Cloth
The next thing you need to do is choose a fiberglass cloth and/or tape. You could buy larger sheets of fiberglass and then "strip" it into 4" or 6" width lengths to be applied as tape. We chose to buy fiberglass "tape" which ran about $1.50/CDN per yard to save the labour on stripping a larger sheet. It took about 18-20 yards to complete the project. There are basically two types of cloth available, chopped strand mat and woven. Chopped strand/surface mat is a material comprised of chopped fiberglass of various lengths randomly dispersed to provide equal distributions in all directions, held together by a resin soluble binder. Chopped strand is commonly used in laminates due to ease of wet out, the good bond provided between layers of woven cloth is comparatively low in cost. It can be hard to fit around corners, but does provide a smooth appearance as the fibres "melt" into the resin. This is commonly used for "all fibreglass" projects as a fiberglass laminate or as a reinforcement in-between layers of gelcoat. I find chopped strand hard to work with, as the "strands" are generally held together by the resin, and can pull apart if you try to "stretch" it across a surface. Chopped strand is generally categorized by "weight per square foot". It is commonly available in a 1oz x 4" Tape or 1 oz x 6" tape.
Assembling the Daggerboard Case
Regardless of the epoxy/tape system your chose, you will need to make sure that your case is well assembled. It is a simple matter of cutting the two sides of the case and then using ample resin, wood screws and glue to hold it together. A little fibreglass tape on the outside of the seams, will also help to seal and give it strength. Basically a 1" x 1" piece of lumber separates the two halves of the daggerboard.

Basic Daggerboard Trunk Assembly
Make sure that prior to placing the daggerboard trunk into the boat you have it assembled and fully sealed. There are two different plans for the size and location daggerboard trunk.
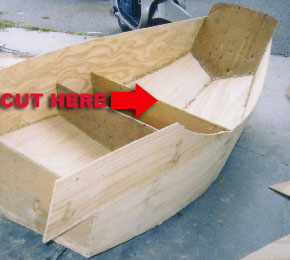
Cutting the Daggerboard Slot
Method #1: Fitting the Daggerboard Trunk Through the Mid-Seat Frame
The trick to the daggerboard slot is to make sure that you place the daggerboard trunk in the boat, and check your fit before you cut through the bottom of the hull. If you plan to cut through the midseat frame using method 1, then measure the middle of the midseat frame and draw a line from the top to the bottom of the hull. Then measure the case, and draw a line on the end of the case from top to bottom along the middle. Match the middle of the case to the middle of the midseat and draw an outline of the daggerboard case, from the bottom of the hull upwards onto the midseat frame. Use a small handsaw to cut out the portion of the frame required to fit the case. You may need to cut along the bottom of the frame, and sand or file any excess material from the bottom of the frame, in a method so as to have a nice clean opening for the daggerboard trunk to sit. Periodically check the daggerboard trunk to the hull, and make sure it makes a flush fit with no gaps.
METHOD 1: Cutting through the midframe
Method 1: Mounting the daggerboard case through the midseat frame.
Make sure before the case is permanately attached to the hull, that you cut a slot.
This method places the trunk between the two frames.
Cutting the slot - for both daggerboard methods
The next step is to cut the slot for the daggerboard to pass through the hull. The easiest method for cutting the slot, is to trace around the daggerboard trunk, and then make an inner slot based on a 1" gap between the halves. You do this by marking a measurement on both sides that is 1/2" distance from the outer diameter, and on each end, marking a measure measurement that is 1" from the outer diamter. Then you link the measuresments together by tracing a retangular slot onto the bottom of the the hull. After the daggerboard slot is cut, you will want to fair it up with a flat file and some sandpaper.
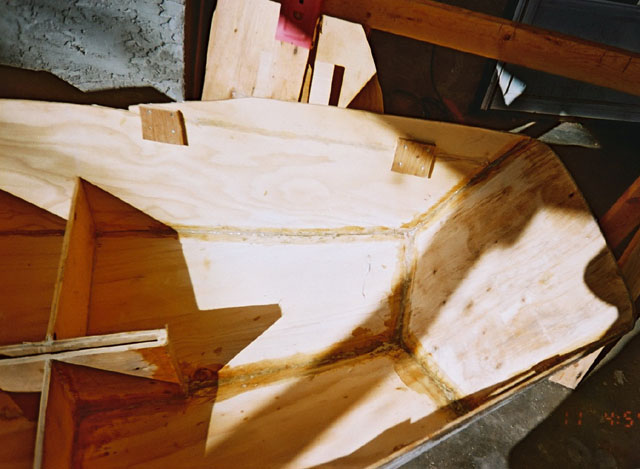
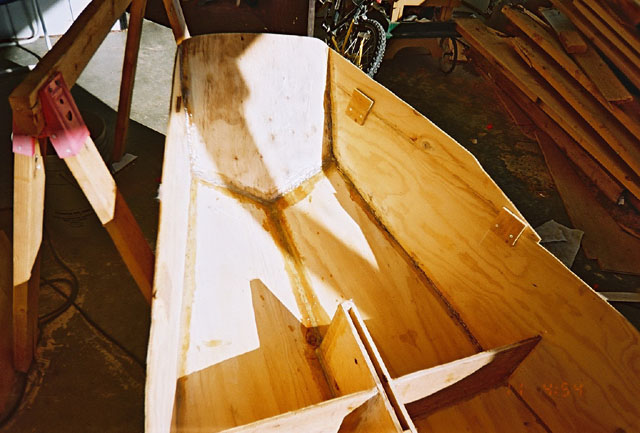
Apply resin and tape to all of the inside seams

The rear seat dividers in the Liberte - Notice the 1x1" frame reinforcements

Another shot of the rear seat dividers -
The middle chamber will be filled with flotation
Mini-Brig Project: Hull Construction - Step 5

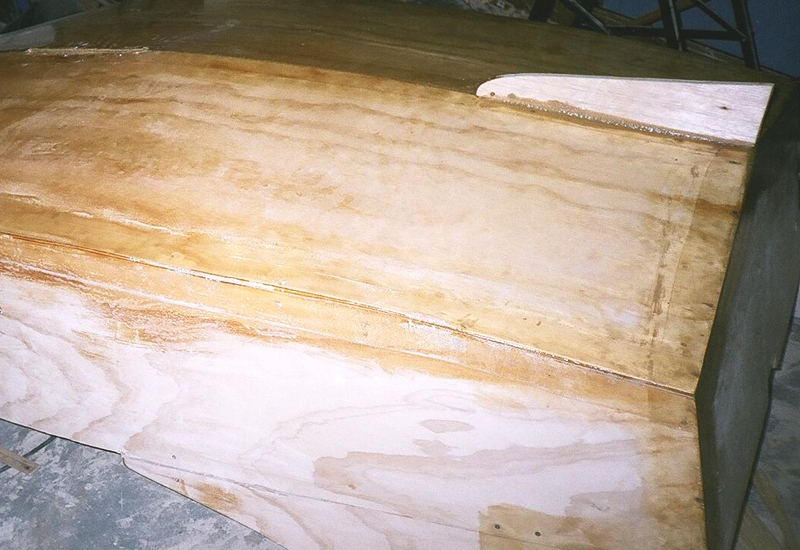
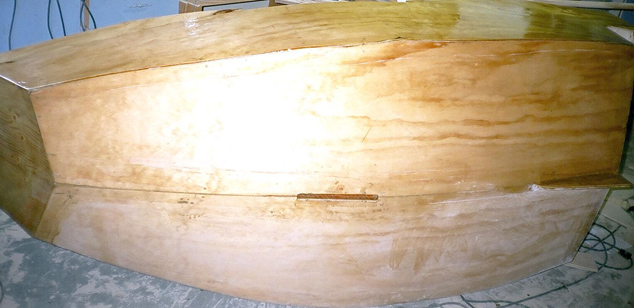
A small skeg at the stern of the boat: cut to size, caulk in place, and reinforce with tape and resin
We also applied several coats of resin on the bow, we applied approximately five coats of resin. All-in-all we used about a gallon of resin, and about 18-20 yards of 4" fibreglass tape to cover all the seams.

Apply Several Layers Of Resin
Bottom of Hull with Skeg and layer of resin applied to one side
Once the hull is fully covered in resin, before we can complete the finishing we will need to make sure that everything is properly attached.
Mini-Brig Project: Hull Construction - Step 6
Painting and Finishing The Hull
Assemble the rigging platforms
Before finishing the hull you may want to fit and drill the holes for the rigging platforms. The rigging platform, in the case of the bow, is made from four pieces of 2x2" timber is that is cut approximately 20" long (Hardwood is preferred) for the outside, and about half that for the inside piece.
There are two pieces that for the platform in the bow, one each side of the hull. The outer piece secures the rigging, and on the inside of the hull, the other 2x2" section provides the mount with which the bow crossbrace will bolt on to. The rigging platform is placed just below the seam between the brig panels and the hull, and then it is bolted together using carriage bolts.

Here is an example of the outboard rigging platform
A picture of the inside rigging platform -
notice it is about half the length of the outside platform.

Priming the hull: normally remove the rigging platforms first.
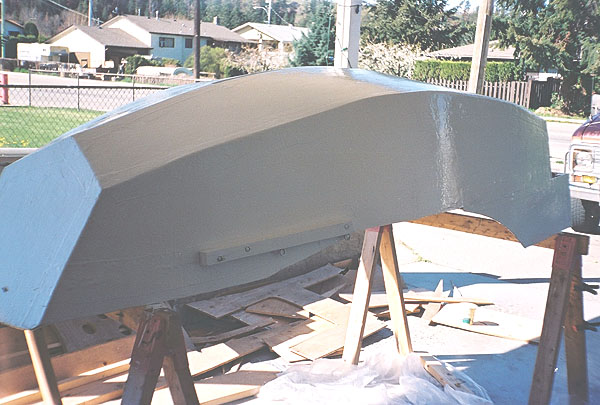
The primed hull is starting to shape up.
The more sanding you do, the better your hull will look!

Applying the "Holland Yellow" stripe to the Adventure.

A fine looking mini-brig!
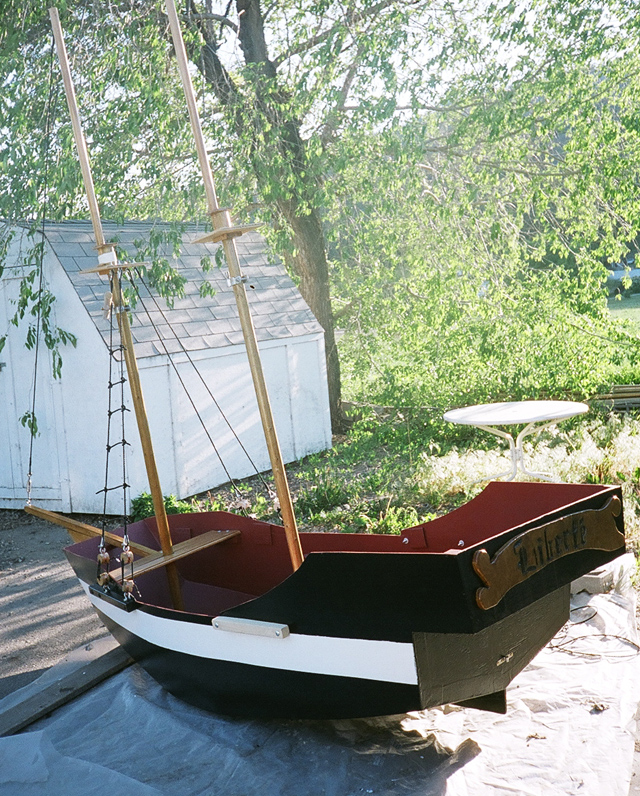
A different paint scheme on the Liberte
Mini-Brig Project: Hull Construction - Step 7
Staining and Painting the Inside
The reason we want to stain or paint the interior at this point is to seal and protect the wood so further attachments can be made such as rigging platforms, cannon shelves, mast-steps and seating. You could attach such parts to the boat and then paint everything, but if by finishing the boat after attaching everything we would have "unfinished" portions under these constructs, and they may become problematic when exposed to weather. It is my own perception that by sealing these areas before applying a "top-coat", it will serve to provide a greater resistance to mildew, rot, etc..
The hull is stained first with a mahogany red gel, then
spruce lathe strips are laid to cover the taping seams.
Another view of the trim pieces. This can be very tricky!
The inside of the Liberte Mini-Brig

Liberte under construction - note 'oxblood' interior and
seats not installed.
Mini-Brig Project: Hull Construction - Step 8
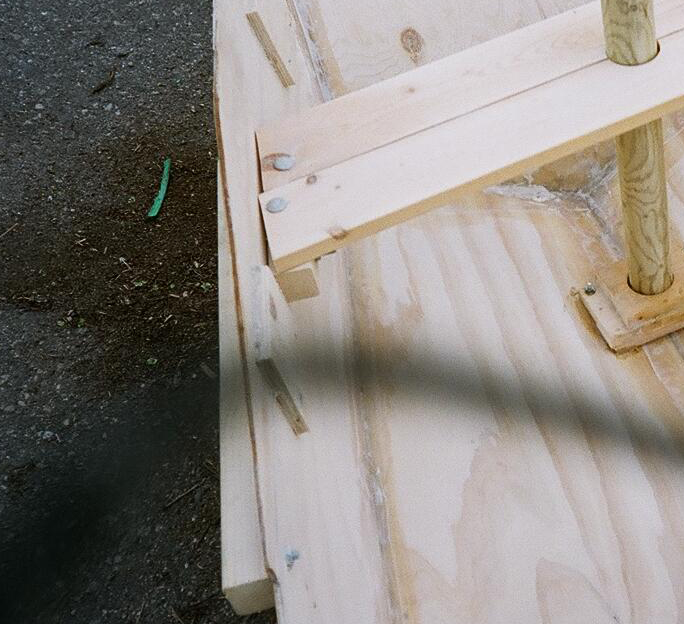
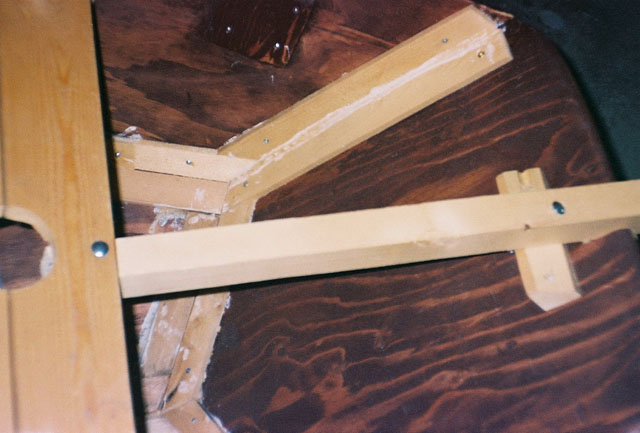
Making the Crossbrace
In order to stiffen up the bow and provide some support for the mast, we added a crossbrace. It is mounted to a 2"x2" block that is bolted to the side of the hull with another 2" x 2" piece of wood on the outside of the hull in a clamshell fashion and this will serve as the rigging platform (see earlier hull construction steps). They are fastened together by the use of carriage botls.
The crossbrace itself is two nice quality 1" x 4" well finished pieces of wood (pine) which are fastened the 2" x 2" through the use of carriage bolts.
The easiest way to determine the measurement (width) of the brace, is to lay the pieces of the crossbrace across the hull where they would sit on the wood blocks, and trace the angle of the cut on each side. Simply cut along the lines, and you should have two boards that fit perpendicular to your hull sides and fit nicely in place.
Note: In lieu of two smaller boards, you could use one larger board - eg. eight inches.
Once in place, we then drilled a hole with a 2 1/4" hole cutter in the centre of the crossbrace for the mast to pass through.
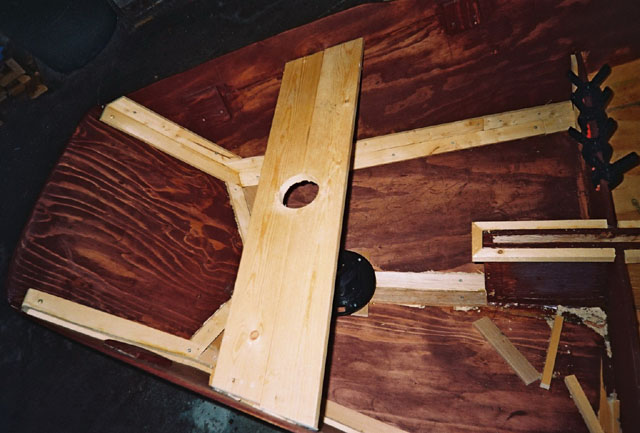
The crossbrace is mounted in place, it can be stained or varnished later.
Another shot of the bow crossbrace. Note: This brig is using wooden mast steps.
Another shot of the crossbrace showing rigging platform.
A view of the dagerboard - Type 1 - Through the frame

Installing the Bow Sprit
Mini-Brig Project: Hull Construction - Step 9
Hull Construction: Step 9
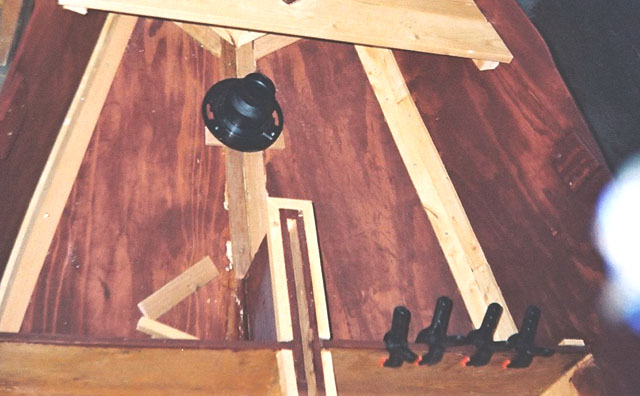
Mounting the Mast Step: Our mast step is made of ABS plastic, and features an upside down 3" drain plug, with a 3" to 2" adapter which the mast convienently slides into. In mounting the mast step we needed to first glue and secure the adapter to the drain. Once we did this, we needed to get the mast step on a level surface. We secured first a piece of 1/2" x 2" by using screws and glue which convienently was enough of an angle to make it level.
.jpg)
Step 1: Mount Mast Step A picture of the maststep from the bow side
Once we had the maststep levelled, We used four short screws and bulldog grip adhesive to secure the mast step to the hull. We did this by drilling holes through the hull from the bottom and securing the mast step with stainless steel stove bolts. Taking care to countersink the heads, as well as epoxying over the top of the bolt heads so it is flush with the bottom of the hull
Mini-Brig Project: Hull Construction - Step 10
Hull Construction: Step 10
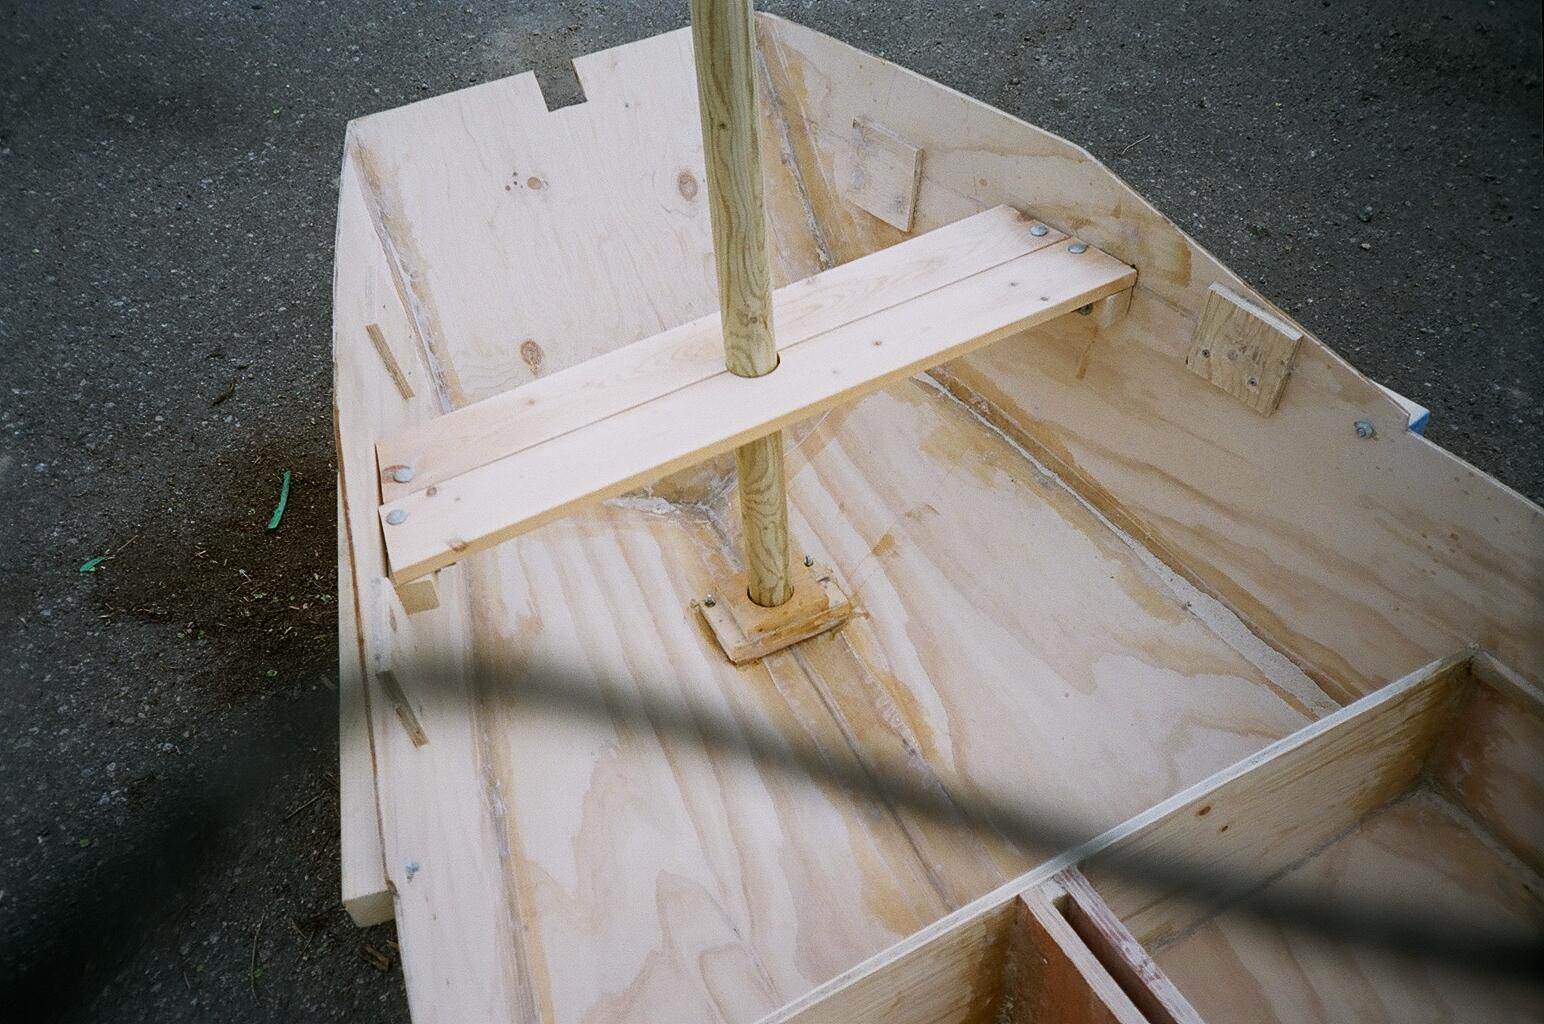
Mounting the Second Mast Step:
Once you have the main mast step in place, you'll want to mount the rear mast step. It is the same size and same material as the first mast step. First we cut a square piece of plywood, just a little larger than the mast step (about 8 inches square) this will serve to level the step. You can finish this piece of wood before you put it in the boat. We then glued and screwed the plywood mount in place and then bolted the mast step through the hull (as in Mast Step 1).
Step 1: Mount Rear Mast Step

A picture of the maststep from above the mid/bow seat
Step 2: Mount Mast Support
Next, you want to make a mast support. We did this by attaching a piece of 2x2 to about a 7x8 inch rectangular piece of 3/4" plywood (you could also use solid wood if you want). We then mounted this piece inside the mid seat frame. (While the picture shows the top of the seat installed, you want to do this before you have attached the seat top). To give it added support we made legs from 2"x2", which was epoxied to the plywood and screwed into the top mounting bracket. We then used a hole cutter to make a hole for the mast and rounded the edges of the 2" x 2" with a belt sander.

Mini-Brig Project: Hull Construction - Step 11
Hull Construction: Step 11
Finishing / Constructing the Mid/Bow Seat:
Step 1: Fill the Seat With Foam/Positive Flotation:
At this point, you'll want to add some positive flotation under the mid/bow seat. This will add a nice safety feature in the unlikely event she should capsize or get swamped. There are several methods to accomplish this. One method is to use "liquid foam" that hardens once it is poured in the seat. This usually comes in two parts, or in a spray can. It is expensive to buy the "expanding foam" in cans for a job this size, it is best to make a visit to your local industrial plastics shop.
Using liquid/expanding foam is the preferred method, but costs quite a bit of money. In our case, since we were on a budget we settled on "Foam Chips" that is to break up a bunch of foam from various electronics products into medium sized pieces that are tightly packed. You could then top this with the liquid expanding foam or glue. It is easy to find foam pieces from large retailers such as Staples, Home Depot, Office Depot etc..
Otherwise, you could buy foam peanuts, or the shipping style "air bags" which can be packed under the seat.

A picture of the mid seat with foam chips installed.
(click to enlarge)
Step 2: Cutting and Mounting The Mid/Bow Seat:
The Mid/Bow Seat is cut in two pieces, you will need to place 2" x 2" blocks about 3" in length inside the frame for the seat to attach to. This will give it good structural integrity and is easier than trying to screw into plywood. Note: see the block in the above photo, you should have several of these in place about 6-8 inches apart.
You can finish these blocks with a light coat of shellac or varnish to keep them from rotting/weathering if you wish. However, the seat should be mounted fairly tightly so that no water is able to get in.
The seat extends past the front of the daggerboard trunk, this will serve as a seat for a crew person / gunner. The Daggerboard sits recessed in the trunk, so a boat cushion can be placed on top of the daggerboard, as the trunk also doubles as a seat.
A couple of small 1/2" x 1" legs are attached to 2" x 2" blocks on the underside of the seat, and serve as "legs" to provide added support. These are epoxied in place to the inside of the hull. Brass screws are used to hold the seat in place with the frame screwing it into the mounting blocks, and any gaps are filled by caulking and/or wood putty. This is best done by turning the boat upside down, and then looking along the seam.

A picture of the finished mid/bow seat installed.
(click to enlarge)
Step 3: Install the rear seat
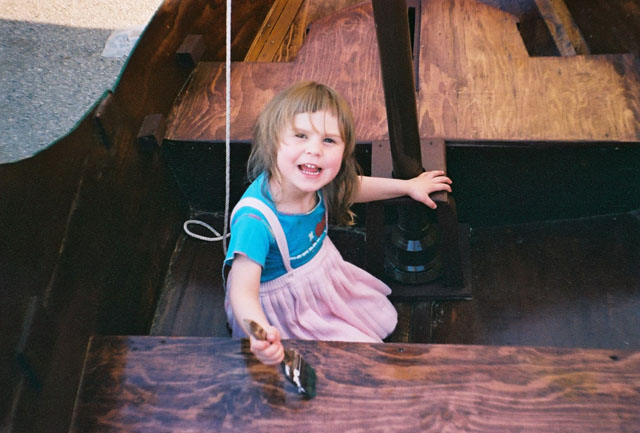
You will also want to install the rear (captain's) seat in the same fashion. We used 2x2" blocks to help anchor the seat to the sides of the brig and sealed it with Lepages "Bulldog" grip pl premium adhesive. This seat could have also haven been fitted with a hinged lid and possibly used for storage (see pictures of Liberte). We didn't try this option on the Adventure.
Painting and Installing the rear seat is child's play (This is my 3 1/2 year old daughter Kaylin)
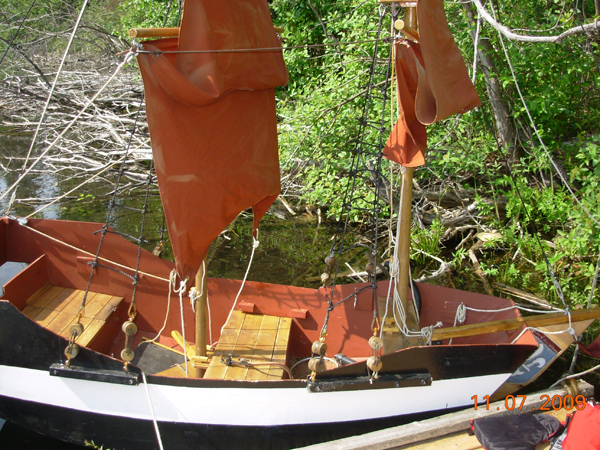
The Liberte has a sectioned rear seat, with the middle set for flotation and storage lockers on both port and starboard.

The rear seat in the Liberte is separated into compartments, with the middle containing positive floatation and the sides, with hinged lids that provide a storage lockee.Once everything has been "dry fitted" and glued together, you will need to seal the wood by liberally applying epoxy.
Also, if the boat is going to be seeing any kind of weather or stored outside, the chambers could fill with water. It is adviseable to drill a small "breather" hole that can be corked or plugged so that the chamber can dry out should it become water logged.
In Liberte, there is a small 1 /34" PVC pipe that is drilled into the centre chamber about 1" up from the bottom of the boat. it can be plugged with a wood cork fit to size, or a PVC cap. The purpose is to allow rain, and bildge water the ability to drain out of the locker. and provide ventillation so that the chamber can dry out in better weather.
Mini-Brig Project: Hull Construction - Step 12
Hull Construction: Step 12
Finishing Interior/Fittings:
Step 1: Varnishing The Wood
Now is the time to finish the wood by putting several layers of a good varnish. This is where it pays to use a quality product. In our instance we used a mini-wax professional series fast dry varnish. You could also use any of the traditional spar varnishes or varathane.
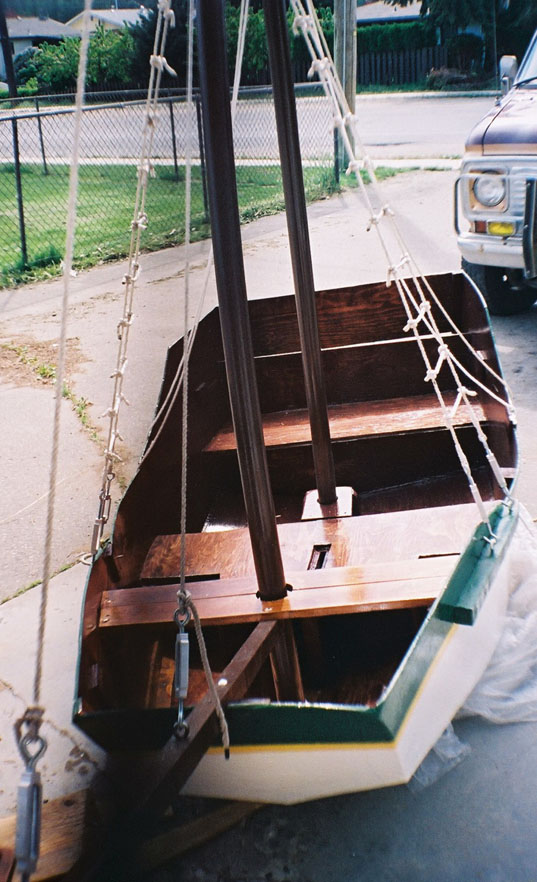
The Interior Varnished and Ready To Go
Step 2: Cutting and forming the rudder and daggerboard:
With the hull finished, you will now need to cut and sand the rudder, tiller and daggerboard. There are various configurations available and you can use the standard D4 plan, or use the plans from the advanced D4 Brig CD.
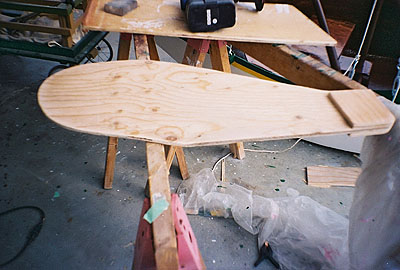
The Rudder Under Construction
The Tiller was made by laminating together three pieces of 2"x2". and then fixed to the rudder with a bolt. The Tiller is currently a little long, and we may shorten it. We then placed several coats of varnish over te tiller.
You will need to order some pintles and gudgeons for the rudder hinges. The Duckworks chandlery is a great place to obtain these. You can order these here.
 .
.
The pintles & gudgeons and our" Rudder Keeper"
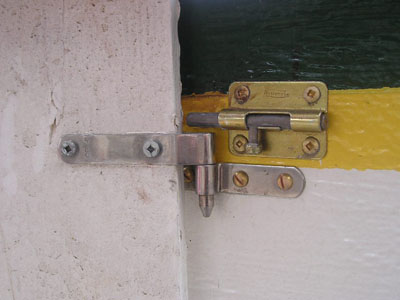
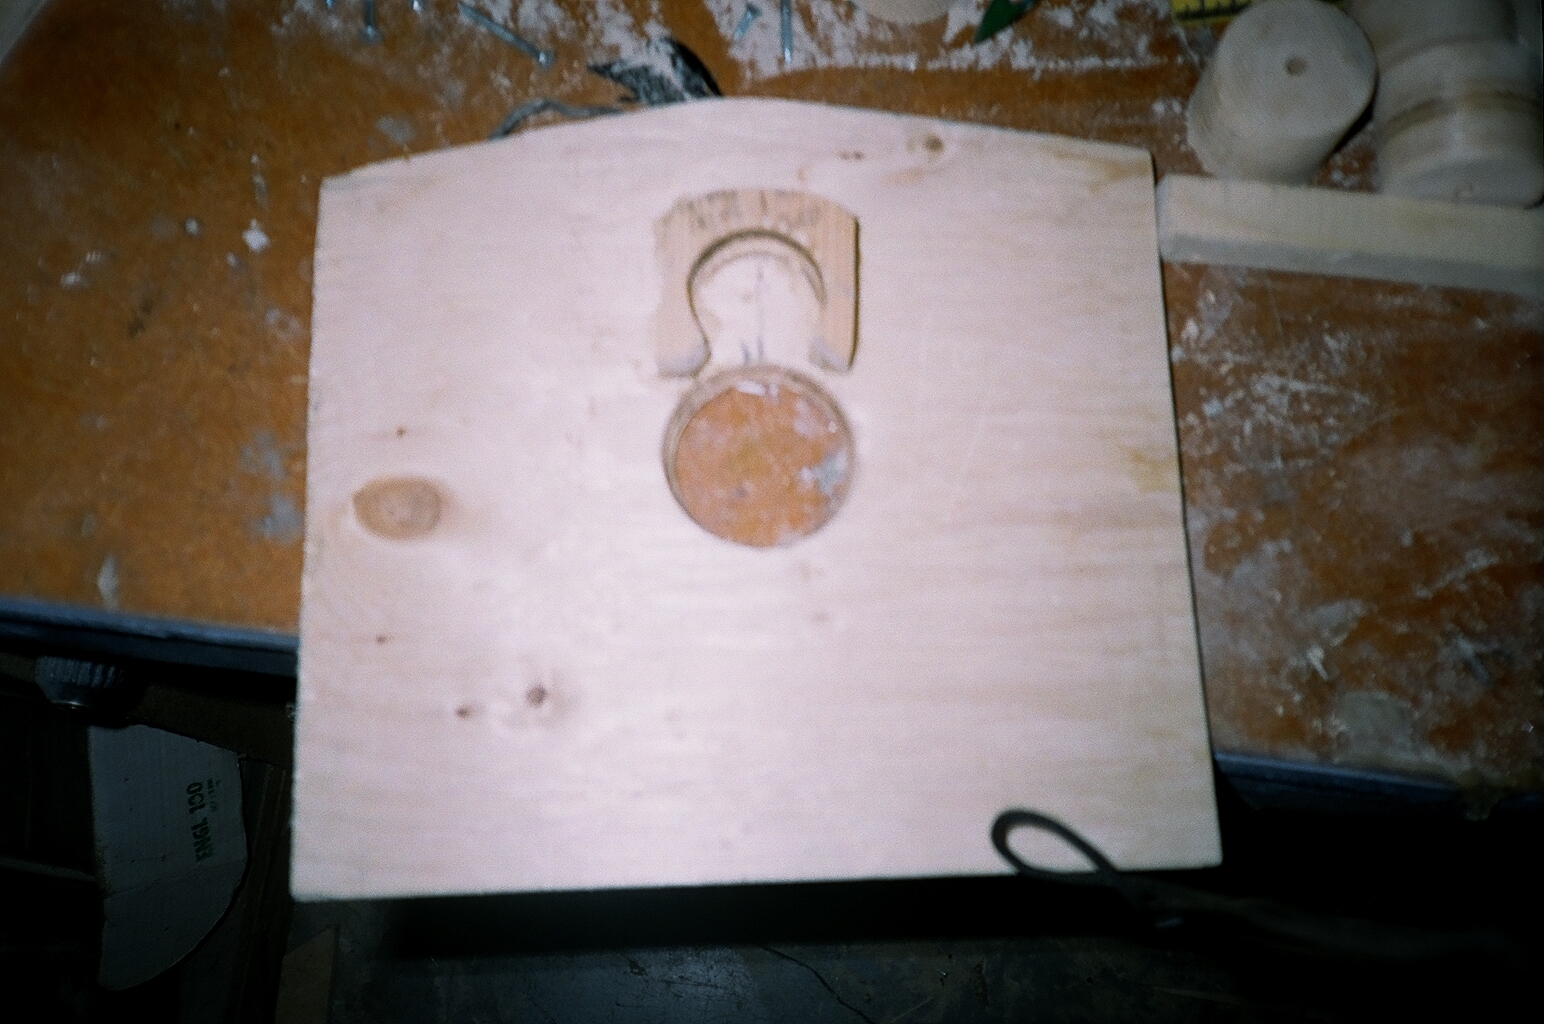
The daggerboard has a thin 1/2" strip at the top to prevent it from sliding down into the trunk housing, and so it fits flush with the seat. A hole is drilled in the bow side of the board and a sliding lockbolt holds it in place. You can develop whatever keeper system you want, even a bungee chord will work!! Don't forget, your gunner/crew will be sitting on this board so that will also help to hold it in place.

The Daggerboard lock mechanism. It slide into a hole on the bow side of the daggerboard
You should also install a set of gunnels, this will help provide rigidity, and absorb any actions such as banging against a dock, other boats, etc. The gunnels also serve as a support for oar locks, and cannon decks. The gunnels are a 1/2" x 2" strip of hardwood, located between each of the rigging mounts on the outside of the boat. We screwed and glued the gunnels in place.
 .
.
Here is a picture of the gunnels and cannon decks in place
At this time we also added our "cannon decks" which support two carbide cannons on each side. The decks are removeable for when they are not in use. Our cannons sit on the decks and then lock in place. The cannon deck instructions are available on the advanced D4 Brig CD.
Mini-Brig Project: Rigging & Sails: Step 1 - Making the Spars
Rigging & Sails: Step 1 - Making the Spars
Step 1: Choosing Your Materials
There is alot to be said about choosing the type of materials to be used for both the sails and masts. In deciding on what products to use, it is helpful to consider cost, availability and durability. The main consideration is strength and weight. You want as low a weight as possible while still maintaining a high strength. Due to the small size of the masts - wood or aluminum make great choices, and is our preferred material. However, for serveral years, the Adventure had simple ABS masts, that worked quite well.
WOOD
In the most traditional sense, wood makes a good material for masts, but it does have some drawbacks. Firstly, spar varnish oftens wears easily and doesn't hold up to weather, for example UV rays break down even the best varnishes and typically if the boat is stored outdoors, it will require constant refinishing (usually once a year). If you paint the wood, with a good marine enamel, this may withstand weathering a little better, but has the drawback of losing some of the aesthitic appeal. Also, of primary importance is weight aloft, the mini-brigantines do not have much ballast below the waterline, and as a result a heavy mast aloft could create trouble! Try to keep it light!
There are different types of wood that can be used, and each has it owns characteristics. The general consensus is that white or Norway pine, Sitka spruce and Douglas fir are the best candidates for spars.
In choosing wood for spars, a greater amount of consideration is given to the weight of the wood, assuming that it is strong enough for the anticipated loads. In the case of the mini-brigantines the "sail load" is very light, and with adequate rigging in place almost any wood would be able to handle reasonable loads. So it is best to find as light as wood as you can. The reason for this is the effect upon the stability of the vessel of topside weights located above the theoretical center of gravity - the more weight and the higher up it is placed in relation to the center of gravity for the entire hull, the more adverse is the effect on transverse stability. Sitka spruce is particularly desirable for spars due to its relative light weight as well as its considerable strength. Though many species are much stronger, a properly crafted mast of quality spruce timber, and supported with adequate stays and shrouds, is amply strong enough for the job, yet lighter than many other species that are equally strong enough. Before the days of carbon fiber and composites, hollow masts were being fashioned of laminated strips of Sitka spruce. This was known as a "birdsmouth mast", where a small notch was cut in each strip to allow it to come together in and 8 or 12 sided polygonal mast. It was then shaved and rounded through planing and sanding. This technique added strength while reducing topside weights at the same time and was probably considered a high-tech method in its time. There is a good article on birdsmouth mast design here: http://www.duckworksmagazine.com/04/s/articles/birdsmouth/
You can also view the birdsmouth mast making process here: http://www.christinedemerchant.com/mast.html
In comparison to Sitka Spruce, Douglas Fir is around 24% stiffer and is 20% stronger than spruce when a spar is bent to the the breaking point. But, it's also 20% heavier. However, you can reduce the diameter of a Douglas Fir spar to the point where it's just as strong as spruce and no more heavy.
In any event, in the case of a small boat you don't necessarily need any "special grade" boat lumber for creating masts and spars. The mini-brigs have relatively short masts (less than 12 feet) and small diameters. The easiest solution we have found to masts, is to find a good quality 2" dia and 8Ft long "Tree Post/Stake" at Lowe's or Home Depot that has been treated. Look for a good straight section that is free of knots or large splits.
For example: https://www.lowes.com/pd/Greenes-96-in-x-Wood-Tree-Stake/3341846
Cut the last two foot spike off, only 6ft required for the main part of the mast. Be careful if you decide to sand the rough mast smooth - with treated wood, it is toxic to inhale the sawdust (use of a good particle mask is required). Once smooth, it is possible to fill in the "cracks" with a good epoxy or glue and sand again, and coat with a good quality varnish or shellac. The advantage of pressure treating is that it will not degrade and is less likely to split when wet - the masts have really held up well.
However, if you have the money and prefer a traditional spruce or fir spar, you can contact:
Queen Charlotte Island Boat Lumber
PO Box 293
Port Clements BC V0T 1R0
250-557-4282
obrien@qcislands.net
McClananhan Lumber, Inc. Larry McClananhan
P.O. Box 1483, Forks, WA 98331
Phone: (360) 374-5887 Fax: (360) 374-5800
Pacific Western Timbers
8000 Imperial Way, Port Orchard, WA
360-674-2700
However, you would probably do just as well to shop around your local hardware store, look for a good quality piece of timber with as few knots (hopefully none) as possible. You should be be able to find Douglas Fir or Spruce. The finished result can look quite nice and is very durable. begin by laminating 2x3's or 2x4s together, then rip one side on a table saw to get it down to 2x2, and then round the edges.
Our masts are in two sections, a top mast, which is 4ft long and 1 1/2" wide, and the main lower mast whichis 6' by 2" in diameter. For our top masts we used a hardwood. We could not find any spruce or fir in our diameter so we used hemlock, which is also a nice strong wood. The wood is 1 1/2" thick in diameter.
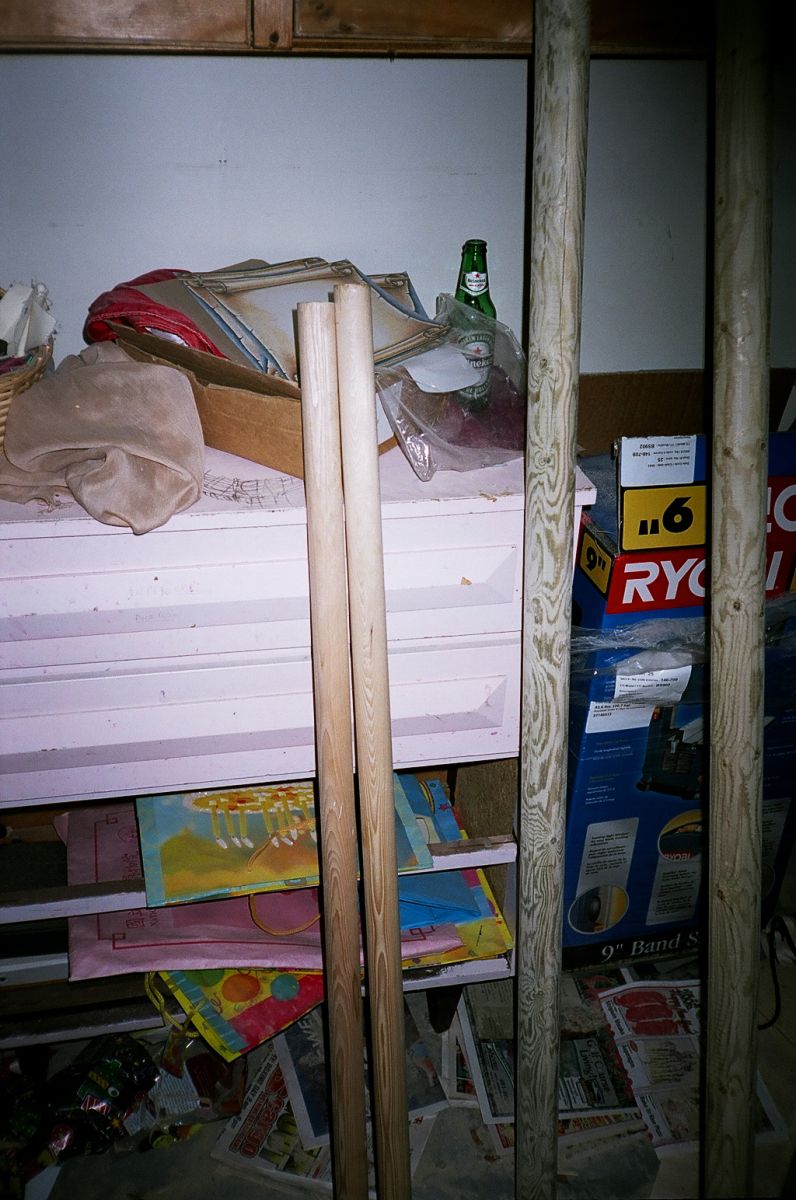
Wooden Main & Top Masts for the Liberte
Cutting the wood to shape - we have (2 ) 1 1/2" x 4' top masts & (2) 2" x 6' main masts.
The next step is to make a platform for the riggingplatform /fighting top to secure to. This is as easy as cutting a 3 1/2 x 3 1/2 piece of 1" x 4" lumber.
We cut a 2" diameter tight fitting hole so they main mast will fit through just fine. It then is caulked/epoxied into place, about 4" from the top of the main mast.
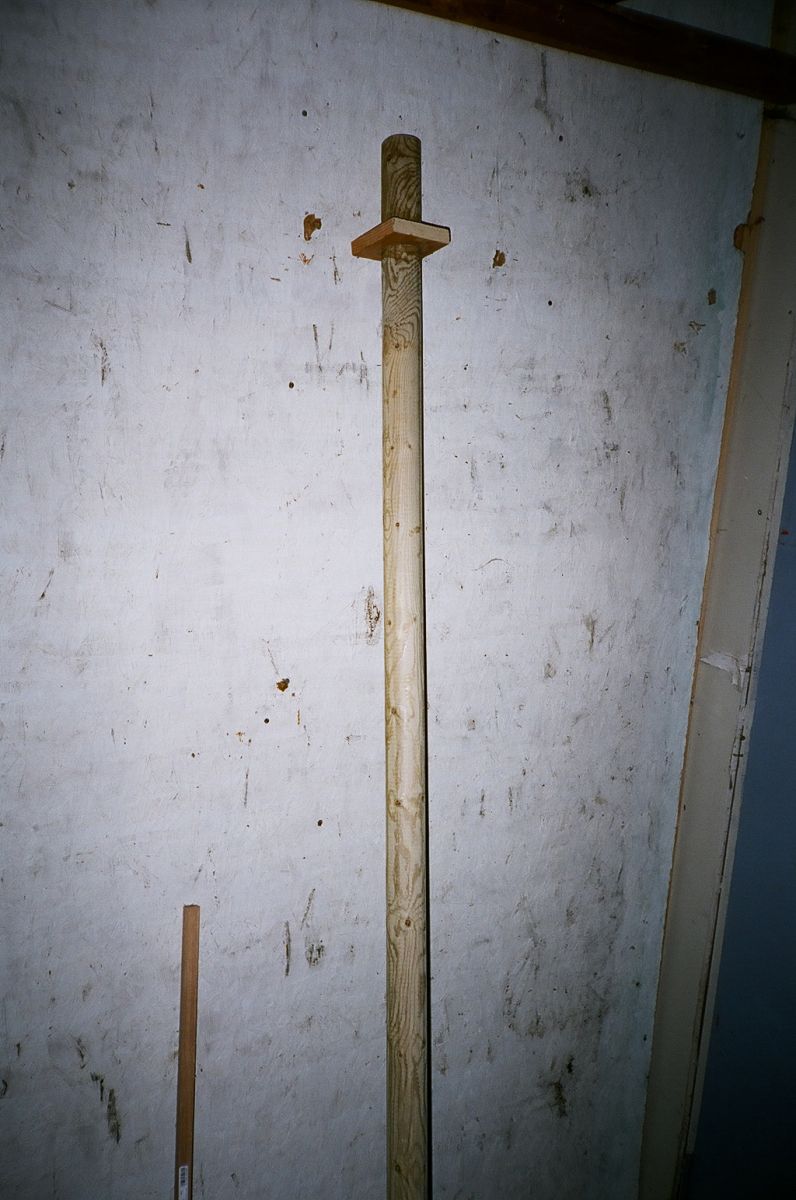
Liberte Main Mast with the 3 1/2" stopper plate
The next step is to cut out the platform/fighting-top. This will also go over the top of the mast, and forms the base for top-mast. We will also make a little simplified maststep for the topmast to slip into, kind of like a socket. Essentially we join the two masts by epoxing and gluing them together.
1) First create the fighting top base from the plans. Cut a 2" diameter hole in the centre. Glue the top-mast step onto the fighting top with epoxy or tightbond III and clamp into place.
2) Glue the top-mast into place by inserting it into the mast step. Place thickened epoxy or caulking between the main-mast and the top mast to help hold it in place

3) Cut out a second wood platform, both holes for the top mast and the main mast and glue into place over the main-mast.

4) Coat the masts in glue and/or epoxy and whip and 1/8" chord around both masts to help secure in place. Liberally apply expoxy and/or glue and let it soak into the chording.

Wooden Main & Top Masts Assembled
We will give it a final once over with about a 60-80 grit sand paper to remove any final imperfections. We will give a light coat of varnish, at this point we dont want to get to heavy with the varnish.
Aluminum:
Aluminum masts in dinghies were first seen after the Second World War. They were tried in the development of class dinghies such as the International Moth and the International 14. There was a relatively cheap supply of aluminum standard foil sections from the aerospace industry, which were tried out in these development classes.
At present aluminum masts are the most common for most cruisers and a large number of racing classes. aluminum was used in the 30's for large yachts, such as the J-class "Shamrock V".
The size of the mast that needs to be constructed will largely determine the manufacturing method employed. For simple dinghy masts and small cruisers a standard extruded mast section is commonly employed, these are made by extruding aluminum through a mould. The mast is then chopped to its desired length and the fittings are attached. This is the cheapest form of aluminum mast since it does not require the use of expensive machinery and moulds. The design and manufacturing methods used to make extruded aluminum masts has changed little since the 70's however it is still by far the most popular type of mast that is in use today.
For higher performance and larger masts the same system can be employed, Only that a triangle is cut out of the top of the mast ant the space is bent and welded together. The resulting shape has a tapered top enabling the mast to bend more.
The latest development in aluminum masts is the use of Alustartm. This is an aluminum alloy developed for the marine industry. With a 20% increase in the strength of the alloy over other marine grades the plate thickness used can be reduced, therefore reducing the weight of the mast. It keeps its corrosion resistance, bend ability and weld ability of other aluminum alloys in its group. This alloy is available in plate form with which aluminum plate masts are constructed. These masts are said to be stronger and lighter than extruded aluminum masts, although as yet no comparisons of strength have been found.
You can purchase a custom aluminum mast or look through classifieds and want ads for a used one and then cut the mast to specifications. In this case, we thought the aluminum mast too expensive so we opted for a different method. A good source for aluminum masts may be the used market, for example: older windsurfers. and dinghy's whose hulls have rotted away or suffered damage. The big advantage to aluminum is that it has a strong corrosion resistance, and weathers well.
Carbon Fibre Masts
Carbon masts began to be used in the early 90's, initially in the America's cup and Admirals cup yachts. In the decade since their first use carbon fibre is still not as widely used as one might think.
Using the very latest technology, carbon fibre spars manufacturers bring to the dinghy and yachting world spars that herald a new dawn in the design of production CF rigs. Through the use of carbon fibre a mast can be manufactured which is lighter and stiffer than an aluminum mast. This can significantly improve the performance of the rig. There are 2 main manufacturing methods employed in the construction of a carbon mast. The first is to use a standard section mould to produce a uniform section throughout the length of the mast. This is the cheapest type of carbon mast as the moulds used to make the standard section can be used more than once. They can be built as "one-offs" for a particular yacht. This type is more expensive since a mould has to be constructed to the specifications of the mast, this mould can usually only be used once. The main problem with carbon is the additional cost of the materials and the increased labour involved. A typical carbon mast will be approximately 7 times the cost of an aluminum mast.
Through the use of modern computer technology, such as CFD (computational fluid dynamics) and FEA (Finite element analysis) the precise loads on the mast can be calculated. Therefore a carbon mast can be built with increased strength in the direction of the principle loads. For optimum sail shape the bend of the mast is very important, it flattens the sail, since a carbon mast can be manufactured with precisely controlled orientation of fibres it is possible to create a mast which has the correct bending characteristics. This is an important advance in technology, complement this with new sail technology and they form a superior aerodynamic shape that could ever be achieved with an aluminum mast and polyester sails. The use of CFD can also determine the flow around the mast and on the more powerful programs the interaction of the sails and the standing rigging can also be taken into account.
Carbon fibre is an extremely well suited material for the manufacture of masts. It offers high strength with low weight, complex shapes can be produced and they have also proven to be reliable. There have been problems with carbon masts recently. The development of carbon masts for IACC yachts have shown that when a carbon mast fails (usually due to under engineering the mast or failure of another rig component leading to the failure of the mast) splinters of carbon fibre are produced and can cause harm to the crew or the boat.
The best and least expensive source of carbon fibre masts are ones taken from broken windsurfers and the like. These sections in coastal areas can often be had inexpensively at swap meets.
If you have enough experience you might try making your own:
http://www.sailingsource.com/cherub/masts.htm#intro
Epoxy Masts
Similar to the carbon fibre, epoxy and e-glass cloth are layered up on a mold. These are less expensive than the carbon masts but do not have the same strength quality. For our purpose, in the D4 brig, this is suitable enough, again the used market would be a good place to start.
PVC/ABS/Cold Moulded Masts:
This is a method that is not generally endorsed by the boat building community because of the flexibility of PVC and ABS. However, we decided to experiment with this method because of the ease of use and the ability for PVC to fit in the fittings in the boat. It is also inexpensive, and seemed to meet our minimal sail loads just fine.
COLD MOULDING WITH PVC AND LAMINATIONS:
COLD-MOULDED SPARS
By David N. Goodchild
I was until recently, a crew member of the oldest and largest, wooden, square rigged vessel still sailing on a regular basis in the world today. This is the Gazela of Philadelphia, previously known as the Gazela Primiero. She is a Barkentine of 177' overall, carrying a course, lower topsail, upper topsail and t'gallent on her foremast.
I was already thinking about TOAD in 1988 when we were down-rigging the vessel for the winter, and, while bringing down the yards, (some of which weighed over a ton), and carrying them with many willing hands to their storage yard, it occurred to me that a much lighter and even stronger spar could be built by cold-moulding veneers over an X-frame. Needless to say, the Philadelphia Ship Preservation Guild was not interested in replacing Gazela's spars with cold-moulded versions, and this idea would lay dormant until it came time to think carefully about the rig for TOAD.
I started out with the original idea. I laminated up a 24' long X-member from 1/4" plywood, with the idea of tapering it to the original boat's pole mast dimensions. I first ripped enough yellow pine to make a 24' long 1" square center core. This I dadoed to take the ply. I inserted the 1/4" ply pieces into this dado, cutting the mating ends at an angle to spread the stresses. I let it set up for a couple of days, and then was ready to taper it prior to laminating the veneers.
Here's where I started to become disenchanted with this method. Understand, I am not disenchanted with the method in general, and for another boat it should prove very useful, but I had subsequently decided that I wanted to be able to reef the topmast to reduce the overall mast height to just below 20' in order to pass under most bridges. In addition, it was clear that tapering the X-member was going to prove troublesome.
Something else was needed!
We had recently re-zoned the house to both improve the heating output and reduce oil consumption. In the process, we had re-routed some waste lines and there was some PVC left over and lying around.
Ah Hah!
If I used the PVC, I could reef the topmast by telescoping it down into the main mast! This I certainly couldn't do with the X-member in place, since it would be in the way. The mast wouldn't be tapered, but I could live with that, especially since I would be able to devise a simple tackle to lower the topmast down into the main mast easily and quickly. Besides, for gaff rig, a non-tapered mast would provide better bearing aloft for the gaff saddle.
I knew that Schedule 40 PVC was strong, since I had used it for the rudder tube, and in testing, it was very clear that the material was tough indeed. It was strong, but in long lengths it was as limp and whippy as a tired Casanova! How to fix that?
Referring back to the rudder tube construction in Part 5, (Building Toad Hall: A 12-Part Series in Messing About in Boats) it will be remembered that I steamed Maple veneer and glued it to the tube with contact cement, since this is the only glue which will adhere to PVC. I planned to use the same method to stiffen up the mast and spars. I knew that after I had laminated several layers of veneer over this first contact-cemented layer, and epoxied it all together I would have a very stiff and strong spar. And this is what developed.
I went to my plumbing supply store and bought a 10 foot length of 1 1/4" Schedule 40 PVC. When I got it home I set up the steam-box. The steam-box is needed, because the 1/16" veneer needs to be steamed first to achieve a close approximation to the diameter of the pipe in the small diameters used for the bowsprit, boom, etc. After it achieves this curve, it is then easy to coat with the cement or epoxy and roll it on to the PVC.
I had previously ordered 500 square feet (their minimum order) of 1/16" Douglas Fir veneers from the Dean Company in Gresham, Oregon. I could have used 1/16" Sitka Spruce, but they only offer short lengths of this and the 1/8" Spruce was a little too thick for easy bending to tight radii. The Fir veneers were beautiful! Absolutely clear with a fine grain and a Douglas Fir mast is certainly traditional!
Building the spars was easy.
It is first necessary to steam the veneers and for this I built a simple steam box out of plywood and 2 X 4's, some 3" smoke pipe and a turkey roaster set over our kitchen gas stove. It is necessary to clamp the steamed veneer around a "mandrel" to allow it to dry to a tight radius and for this I used ABS pipe of the same dimension as the PVC core I planned to use. (Don't use PVC for this; the steam will turn it into a noodle!). After about 20 minutes in the steam box I slid out the veneer a foot or so at a time and clamped it around the mandrel with hose clamps. This I let dry over night. After steaming, clamping and drying a bunch of veneers I was ready for spar building!
I started with the Mizzen Mast. After contact-cementing the first layer, I laminated up the additional layers with epoxy. I used 4 laminations of 1/16" veneer for a total thickness to the mast wall of 7/16". This is consistent with established scantlings for "built" masts of approximately 1/5 of the mast diameter as given in such diverse references as Kinney's Skene's Elements of Yacht Design, Nicholson's Boat Data Book and Buehler's Backyard Boatbuilding. One quarter inch of this mast wall is the veneer and the other 3/16" is the Schedule 40 PVC. This resulted in a mast diameter of 2 1/4". (The dimension of the PVC pipe is I.D., so a 1 1/4" pipe measures 1 5/8" OD, plus an additional 1/4" wall thickness of veneer for a total of 2 1/4 inches OD.). When I had finished the laminations of the mast, it was stiffer than my dinghy mast which was of equivalent dimension but built up in the conventional manner.
I had previously tested out the stiffness of the smaller diameter PVC/veneer combination with excellent results. Even the 1 1/4" PVC could support my weight with just two veneers applied. It bent certainly, but the comparison with the unstiffened PVC was dramatic. Also, the spars were very light, much lighter (and, I think much stronger) than their original solid counterparts.
The photograph above shows the construction, with the four veneers wrapped around the PVC core. I had originally thought that I would have to insert a piece of metal pipe into the PVC in order to stiffen up the flexible pipe so that it would be straight enough to apply the veneers. I found however, that the act of clamping and gluing a cylinder of a single 1/16" veneer around the pipe straightened it up immediately. When finished, the mast was absolutely straight.
The Mizzen Mast is not tapered since the Main Mast is not tapered.
I found another real advantage to this method of spar building; the elimination of the need for so many clamps. In fact, I built the Mizzen mast with one hose clamp (not counting the steam mandrel operation) and a roll of fiberglass-reinforced shipping tape. Here's how:

After the first layer of veneer has been contact cemented to the PVC, the second layer can be epoxied on. Spread your epoxy on either the mast or the curved veneer. (I use a slightly thickened mixture to eliminate too much soaking in to the veneer). Put on a hose clamp at one end about 6" in. Not too tight, just enough to snug the veneer to the underlying layer. (Remember, epoxy loves a gap, hates to be too tight). Wrap a piece of tape around the mast at the end. Move the clamp down further. Put on more tape (about every 6" along the spar). Keep moving the clamp and putting on tape until you get to the other end. Don't worry about the tape sticking to the veneer with the epoxy. It's a polethylene tape and the epoxy will not adhere it. There is a minor bond but it pulls right off. Sand down the epoxy squeeze out (if any) and you are ready for the next layer.

I am very enthusiastic about this method of mast construction. The naked PVC can be bent to 90 degrees without damage, the pipe walls can be compressed in a vise until they touch without damage, and the walls can be repeatedly hammered with a heavy sledge without damage. I know this because I have conducted all of these tests. I very much like the idea of this very tough flexible core living inside a stiff, strong and beautiful outer shell. While I am not an engineer, I feel very strongly that this combination creates a very effective spar. Should the worst happen, it is reassuring to know that there is a mast which, even if the outer veneers are fractured, has a second line of defense in the PVC. It might be whippy, but it will be there!
I had also been concerned about just how I was going to be able to get a good seam upon wrapping the veneers. This also proved simple. By wrapping the veneers around the mast, squeezing it together and marking it, one can run a small block plane down the edge until the edges just meet upon being squeezed around the spar.
TAPERING A MAST
While I chose not to taper this mast because I wanted to telescope the topmast and step the mainmast inside the stub mast tube, it is easy to do and I will do this with the course yard. In fact there are three ways that these cold-moulded masts can be tapered.
One simple means of tapering a spar would be to apply the veneers in ever-shortening lengths. The first layer of veneer, is applied from the heel to the truck. The second layer is applied from the heel to a distance below the truck. Additional layers are applied from the heel to an equal distance below the previous layers. This is simple, but probably not acceptable. A modification of this is to simply sand the ridges where the veneers end. This softens the transitions and this is the procedure I used to make the bolster for the Hounds Band on the Mizzen Mast. I applied three layers of veneer and sanded them to a soft transition as shown in the photograph:

The third method is the one I will use for the Course Yard. Once these first layers are on, (and there would be enough to build up the bunt and the yardarm to their respective design dimensions for the taper), then an additional covering layer is epoxied from the bunt to the yardarm using a thickened epoxy glue for the adhesive. This will result in a nicely tapered yard with a very smooth outer skin. This is shown in the exagerrated drawing.
2nd Method: Creating a PVC/ABS Mast
The other method is to fill the ABS mast with liquid expanding foam. This can be considerably more expnesive than simple wood, but it is a method works very well, and provides lots of stiffness to the ABS and a lightweight mast.
We used ABS masts in the Adventure for several years, before converting to wood.
For the Adventure, we used black ABS, and placed all of our fittings first and then filled it with the foam. The procedure is quick and easy.
Foam (yes, the pour in, two part stuff) or buy several of the cans. You probably will find it more economical to use the two part variety. Once set, it will make the PVC/ABS pipe very rigid, keep it light and permit it to float. The foam will prevent the column from deforming under bending loads. It will work for the same reasons foam core structures are so strong. The walls of the pipe actually change shape while a bending load is applied. This is pretty slight, but a measurable ovalish shape must be made for the pipe to bend. The foam will prevent this from happening.This will also allow you to pass through eletrical cables/wires should you wish to add anchor/spot lights for special effects etc.
Next, after letting the foam dry, we used a good rustoleum paint on the outside to inhibit the breakdown of the plastic by UV rays.
The mast is built in two sections, the first is a 6ft piece of 2" PVC/ABS. At the top of the course mast we placed a 2"- 1 1/2" reducer so we could easily insert the next section, which serves at the top mast. At the reducer, we placed a strong 1/2"-3/4" thick platform of plywood (fighting top/crow's nest), reinforced with 1"x1" crosstrees that run on each side of the mast underneath.
Before gluing the reducer onto the mast, we placed all of the fittings on the main mast and top mast. The reducer is then glued using ABS glue or PVC glue depending on the materials used, and the top mast inserted into the reducer. A hose clamp is placed on the outside for reinforcement. The whole thing is then filled with foam. To date, we have not added EMT but may do so next summer for stiffness. We found that with the stays in place our masts could easily withstand and sail up to 30 knot winds. It is important not to mix and match materials and used the right glue for the job. We used PL Premium adhesive to help secure the "fighting tops" to the mast.
Another method to stiffen the ABS masts:
This last method seems to also work well and it involves cutting two lengths of spruce 2"x2" of 3 1/2 feet and 5 1/2 feet wood respectively. You will need to slightly plane the corners until the wood beam can slide into the PVC sleeve. Simply take the 2"x2" lumber and insert it into the center of the core of the the mast. You will need to do very little planing with the bottom portion of the mast, but the top portion may take some effort.
Then, once the lumber is place in the mast you can secure it with a little bit of epoxy or Lepage's Bulldog grip. Also, you will need to drill through the mast for your fittings and these bolts will also help to hold the lumber in place. This combination PVC/Wood mast seems to work very very well and is our best suggestion if you want to try an easy PVC style of mast.
Use a good rustoleum paint on the outside to inhibit the breakdown of the plastic by UV rays. We have found these masts to be bother vey stiff, inexpensive and light.

The fighting top junction.

The whole mast in place
THE YARDS
The yard arms are made from only a slightly thinner diameter timber than the top masts. We use 1 1/4" diameter wood for the yard arms. It is best to use something fairly strong such as oak or hemlock.We have used and seen different methods of attaching the yards to the mast/haliyards depending on the mast construction, and rigging but the basic premise remains the same for most types of masts.
The lower/course yard is fixed, eg.it cannot go up or down. It can however turn leeward or windward. The upper yard is not fixed, that is the topsail yard can move up and down. The first step is to cut the yards to length, the main course is 49" - if you happen to have a piece that is only 48" that is fine.
The Yard pivots on an axle. The axle is comprised of an upside down fence gate hinge, namely the kind used for a wire fence. Normally, this world be clamped around a gatepost. Since the gate is galavnized metal and zinc, it will hold up well to the elements in the boat. The only real modification needed is a small hole so we can put a lynch pin through to hold the yard onto the pin.
This is essentially a pintle and gudgeon system, with the gate hinge serving as our pintle. We place our pintle about 6 inches from the bottom of the fighting top.

The lower yard arm pintle

A piece of metal strapping, made into a gudgeon to attacht the yard. |
A simpler system is to use a small u-bolt.
The yard itsefl then has a gudgeon. We have tried different methods, it seems the best seems to be the use of a small 1/2inch u-bolt that passes through the yard and is capped with brass nuts. Another method is to clamp, a small piece of copper tubing, that serves a bushing for the yard to turn. We found this method to be not as durable as the u-bolt.

The top-mast yardarm is simply attached to the mast by the use of a large u-bolt which wraps around the mast. The ley to the attachment is not to bolt the nuts too tight - you don't need it cinched to the mast. The mast is pulled up via the use of a haylard wich attaches to an eyebolt, that is inserted into the middle of the yard.
Mini-Brig Project: Rigging & Sails: Step 2 - Creating the Standing Rigging
Rigging & Sails: Step 2 - Creating the Standing Rigging
Step 1: Choosing Your Materials
Once again there are a variety of materials that you can use for rigging. Obviously, this may be an area where you might want to "get creative" and experiment with different stuff. For the D4 Brig Adventure, we used three strand nylon fro the halyards and polyester for the rigging, however you could also use manilla. You would be well advised to not use polypropylene rope, as it stretches alot. In any event, to make splicing easy you may find it best to use twisted rope (we used three strand), although some braided rope can be spliced it requires the use of a "fid"
| TWISTED VS. BRAIDED CONSTRUCTION | |
|
|
Twisted Rope There are two general categories of rope construction: twisted and braided. Twisted rope is formed by coiling three strands together in the same direction. The fibers within each of the three strands must twist in the opposite direction as the strands in order to produce a balanced rope, that is, one which hangs straight and resists kinking. Twisted rope must be fused and taped on each end to prevent unraveling. |
|
|
Braided Rope Three general categories of braided construction exist: diamond braid with a core, diamond braid without a core (called hollow braid) and solid braid. Diamond braid is manufactured by weaving ends of yarn over and under, the same fashion in which the maypole dance is done. If there is a core around which the rope is braided it cannot be spliced. If no core exists, the rope is called "hollow braid". The outstanding feature of hollow braided rope is the ability to splice it. . Solid braid is very firm, round and tightly woven with a special lock-stitch construction which prevents unraveling when cut or torn. Solid braided rope stands up especially well to chafing of blocks and pulleys. This construction cannot be spliced. When the rope as well as the core are braided, the construction is know as "braid-on-braid" or "double braid". This is the strongest and most expensive of all rope. |


Polyester Rope
Polyester is one of the most popular ropes in the boating industry. It is very close to nylon in strength but stretches very little and therefore cannot absorb shock loads as well. It is equally resistant as nylon to moisture and chemicals, but is superior in resistance to abrasions and sunlight. Good for mooring, rigging and industrial plant use, it is used as fish net and bolt rope, rope sling and alongside towing hawser.
Polyester is very close to nylon in strength when a steady force is applied. . It is as equally resistant as nylon to moisture and chemicals, but is superior in resistance to abrasion and sunlight. Polyester is the most popular general purpose rope in the boating industry.


Nylon Rope:
Nylon is the strongest of all ropes in common use. When stretched it has a "memory" for returning to its original length. For this reason it is best for absorbing shock loads, as is the case when lifting or towing. Nylon lasts 4-5 times longer than natural fibers because it has good abrasion resistance and is not damaged by oil or most chemicals. Like manila, nylon has good resistance to ultraviolet deterioration from sunlight, referred to as "U.V. stability".
All of the D4 Brig Adventure's halyards are made out of nylon rope.
Manilla Rope:
Manilla is a natural fiber of the abaca plant. Unless you're a calloused shellback, hauling on a manilla line is almost sure to imbed invisible splinters in your hands. These splinters are too small to pull out with tweezers, so the only practical way of removing them is to let them fester out (ouch!).
Splinters are only an irritation, not the real problem with manilla rope. Being a natural fiber, manilla is subject to rot, especially when wet. Even when properly cared for, manilla line had a limited lifespan. Sooner or later, it would start to deteriorate.
A hard natural fiber, manila is especially resistant to sunlight. It is very popular for public utility construction and repair because it will not melt on contact with hot wires or equipment like synthetics do. It will burn, however, if the temperature is very high or if the rope is in contact with the wires/equipment for an extended period of time. Manila holds knots firmly and stretches very little. It must be stored dry to avoid mildew. Chemicals will cause it to deteriorate It is also very easy to splice.
This is a very traditional rope, and if you want a traditional look and feel, use manilla, but be prepared to replace the lines over time.
Polypropylene Rope:
Because of its light weight, polypropylene is the only rope which floats. For this reason, it is very popular for pool markers and water sports. Poly is affected by sunlight deterioration, more so than any other synthetic or natural fiber rope, but its life can be extended by storing it away from direct sunlight. Poly begins to weaken and melt at 150°F, the lowest melting point of all synthetic ropes. It is not as strong as nylon or polyester, but 2-3 times stronger than manila. Because poly is less expensive than other fibers, it is the most popular all-purpose rope for the average consumer
Polypropylene is also subject to alot of stretch, so it doesn't make a good rope for halyards, or stays. It does make a good heaving line for emergancies, and sometimes makes a good "springer" line for mooring. It is generally a good product where stretch is not a concern and light weight is a factor.
Step 2: Making the rigging:
Each end of the rigging we spliced and then whipped any loose ends, by inserting a metal "grommet" called a thimble to form the loop around both the turnbuckles and the eyes on the shrouds. You may want to also make "deadeyes" to give your boat a more traditional look. Here is some information on deadeye and turnbuckles written at the turn-of-the-centuries.
For more information on making creating dead eyes, please see the files: deadeye2.jpg, deadeye2.pdf, DeadEye.pdf in the zip archive.
The Adventure is fitted out with turnbuckles, and the Liberte has standard dead-eyes.
BOAT SAILING IN FAIR WEATHER AND FOUL
BY
CAPTAIN
A. J. KENEALY (1908)
On Rigging
Wire has entirely superseded rope for standing rigging, and deadeyes and lanyards are fast giving way before the advance of the turnbuckle. An old sailor cannot help regretting the decline and fall of his profession and the growing popularity of the art of the blacksmith. So far as the rigging of ships is concerned, when wire rigging was first introduced it was thought that its rigidity would prove a fatal objection to its successful use. Science has, however, set its foot down firmly on such objections. The decree has gone forth that rigging cannot possibly be set up too taut, and the less it stretches the better.
The old argument that a yacht's standing rigging should "give" when the craft is caught in a squall, which old sea dogs were so fond of advancing, has been knocked on the head by scientific men who declare that a vessel's heeling capacity affords much more relief than the yielding quality of rigging. Thus all or nearly all of the modern immense steel sailing vessels in the East Indian and Australian trade have their steel masts stayed as rigidly as possible by means of turnbuckles, and practice seems to have demonstrated the truth of the theory. These ships encounter terrific seas and gales off the Cape of Good Hope and Cape Horn, and their masts are thus subjected to violent and sudden strains, but I have been assured by the commanders of several of these great freight carriers that they have never known their "sticks" to be imperiled by the rigidity of the rigging, and the tauter it can be set up the more secure the masts are supposed to be.
SHROUD, DEADEYE, LANYARD.
 There are, however, a number of old salts who condemn this theory as rank heresy, and go in for deadeyes and lanyards of the old-fashioned kind, and the greater the stretch between the upper and the lower deadeyes the better are they pleased. There is no doubt that turnbuckles look neater than deadeyes, and they are probably well suited for small craft. The Herreshoffs have long used them for setting up the rigging of the sloops and yawls of moderate size which they used to turn out in such numbers, and which first laid the foundation of their fame. The boat owner can please himself as to which method he may choose, and he can rely that with either his mast will be perfectly secure. Both methods are shown in the accompanying cuts.
There is one thing in connection with wire rigging that I must warn the amateur against. Beware of shod wire rigging. "Shoes" are iron plates riveted to the ends of wire rigging to receive shackle bolts. They are never reliable. Eye splices in wire never draw. "Shoes" often collapse without notice.

TURNBUCKLE
Turnbuckles are very handy appliances for setting up rigging in a hurry, whereas the same operation conducted by means of a deadeye and a lanyard takes much more time and trouble. A small craft rigged as a sloop, cutter or yawl, requires only one shroud on each side to afford lateral support to the mast, and a forestay -- which in the case of a cutter or yawl should set up at the stem head, but on a sloop is set up on the bowsprit. A simple way to fit the rigging is to splice an eye in each shroud, forming a collar sufficiently large to pass over the masthead, first covering the part that is to form the eye with canvas sewn on and painted. The starboard shroud goes over the masthead first, then the port one and last the forestay. In large yachts the lower rigging is often fitted in pairs, the bight of the shrouds being passed over the masthead and secured in the form of an eye with a stout wire seizing.
Determing Shroud/Stay Lengths & Splicing
Now to create the shrouds and stays, we first attached the shrouds to the mast via an eye splice, with a metal insert called a "thimble" to prevent from chafing. In the picture below you will notice the rear mast has "loose shrouds", that is the shrouds are run down from the top of the mast where they are fixed by an eye splice. We then tie off at the turnbuckles to get the proper length and then tighten them to allow the rope to stretch. Once we let the ropes "set" for a few hours, when then mark the proper length at the bottom of the turnbuckle and finish it with an eyesplice.
 .
.
Start the eye splice by unraveling eight to ten turns of the strands of rope.
Now seal the ends of each of the three strands with tape or heat to prevent them from unraveling.
|
Next form a loop in the rope by laying the end back along the standing part. Hold the standing part away from you in the left hand with the loop toward you. The unlaid end can now be worked with the right hand. The size of the loop is determined by the point at "X" where the strands are first tucked under the standing part of the rope. Now lay the three opened strands across the standing part as shown in Illustration "A", so that the center strand "B" lies directly over and along the standing part. Left hand strand "A" leads off to the left, right hand strand "C" to the right of the standing part. Tucking the strand ends "A", "B" and "C" under three strands of the standing part is the next step. Get this right and the rest is a piece of cake! Starting with the center strand "B", Select the topmost strand of the standing part and tuck "B" under it.(right to left against the lay of the strands) Tighten but do not distort the natural lay of the strands. Next take left hand strand "A" and tuck it under strand 1(Which is left of strand 2). And then take strand "C" and tuck it under strand 3 (Which is right of strand 2). Tuck from right to left against the lay of the strands for each of these also. If all of the tucks have been made correctly, the eye splice should look like Illustration "B". The splice is completed by continuing to make at least four full tucks with each of the strands. As each added tuck is made be sure it passes over one strand of the standing part, then under the next strand above it, right to left against the lay of the strands. The completed splice should look like Illustration "C". |
Illustration "A" Illustration "B"
llustration "C"
|

Another Eye Splice Diagram

Diagram Three
Whipping A Line
We then "whip" the area of the splice to help hold the splice in place and add a little finishing touch. We have also whipped all of the brace lines, sheets, and ratlines.
A whipping is used on the end of a line to prevent it from becoming unlaid or frayed. The steps are as follows:
- Hold the line in the left hand, the end to be whipped sticking out in front. Have a piece of whipping twine ready.
- Lay the twine on the line so that the loop end is even with the end of the line and hold the other end under the thumb where the whipping will start (this is called the bight).
- Wind the cord tightly around the bight to a length of twice the line diameter.
- Pass the cord end on the last turn up through the bight loop and slowly pull both cord ends.
- When the bight (or slack) moves to the centre, the new loop will be locked at the centre and both ends of the cord can be trimmed off.
- Trim the line half a line diameter from the end of the whipping and heat seal if the line is nylon or polypropylene.
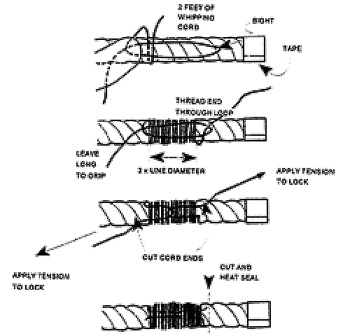
Diagram 1: Whipping A line
The basic dead-eye on the Liberte mini-brig is accomplished by cutting 2" disks with a hole cutter from a piece of 2" X 4". We used a very good grade of wood, as we didn't want knots or cracks in the wood. There is very little difference in price between the econo-stud and premium KD lumber, so in this case is pays to use better quality lumber..
You need to cut four disks per side, similarly you could simply mark out a section of the main mast material and cut disks from the mast stock, we prefer the hole saw method.
Once you have cut the disks, you need three small holes about 1/4" in diameter (you should have one hole already created by the hole saw), in a bowling ball like pattern at the bottom of the disk. Usually, the hole cutter will have left a center hole, so it is a simply matter of drilling two holes about 1/4" up from the bottom edge.
This best accomplished using a drill press, but we drilled ours with a handrill. Take care that the holes are straight. A few of ours went a "little-off" - but that is okay. The deadeye performs admirably.
At this conjecture, you will want to sand all the edges and smooth the holes. This can be accomplished by taking a round file or a rolled up piece of sand paper and running it through the holes. We sanded the outer diamter of the disk to make it smooth. If one wanted a real authentic look, you might spend some time filing the edges so they have a rounded appearance.
Now, you may want to finish the deadeye by staining it, as Ulysses did above, or simple use a light varnish. We used the minwax all in one varnish shellac for a "light-oak" look and then added another layer of protective varnish. Once your varnish has dried, you will want to run the sandpaper/file through the hole again to make sure they aren't plugged.
At this point it is just a matter of wrapping the strapping around the dead-eye, inserting a small 5/8"-7/8" shackle and closing the loop with a small screw and nut. Any excess strapping is trimmed to shape using a pair of tin snips.

The Liberte's "Dead-Eyes"


| Ratlines Pronunciation: rat´linz (Naut.) The small transverse ropes attached to the shrouds and forming the steps of a rope ladder for climbing aloft. |
Ratline is a nautical term, referring to small lengths of horizontal cord that run between the shrouds, several strong ropes that affix the top of a mast to the vessel's sides. The ratlines serve as crude ladder rungs, allowing the crew to scale the mast when necessary. In bygone days, scampering up the ratlines was a last, desperate recourse for sailors on sinking ships, at least if they were unfortunate enough to have missed out on the lifeboats. As a result, "ratline" became a synonym for "last-ditch escape route."
The "Ratlin" as they were later called is formed by a clove hitch. This type of knot tightens when a load is applied. In early vessels, shrouds and ratlins were covered with tar to keep them from rotting. You may want to add ratlins between the shrouds they are tied using a clove hitch.


Tying the ratlins and running the lower shrouds.

A simple clove-hitch knot attaches the ratlins

Fighting Top W/ Standing Rigging
(Notice Eye Splices & Thimbles)
|
|
|
|
Main Topmast: Rigging Positions and Anchors |
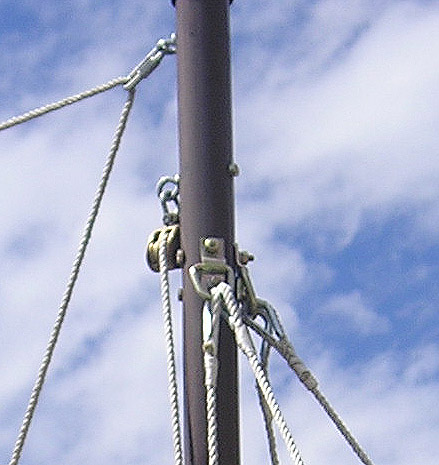
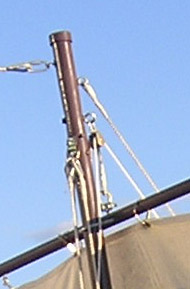
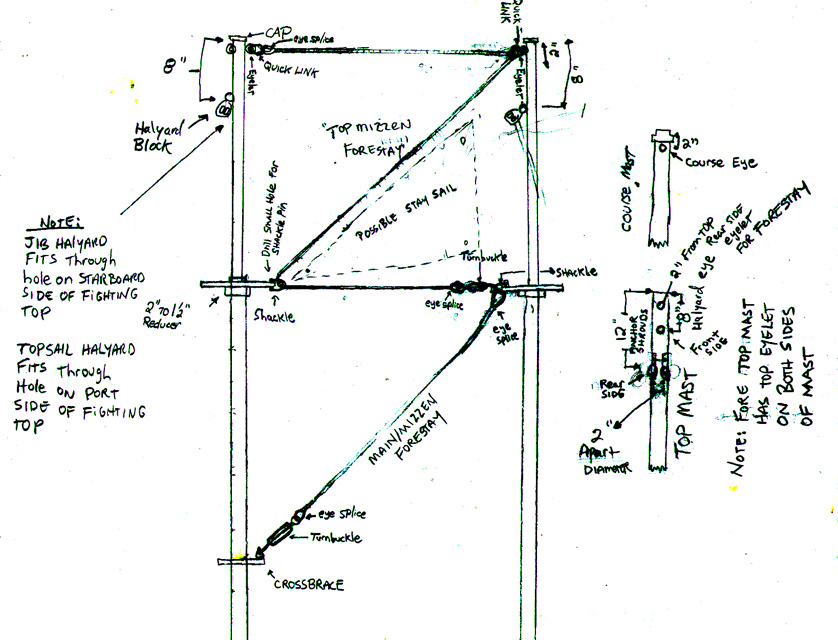
Mini-Brig Project: Rigging & Sails: Step 3 - Running Rigging
Step 1: Choosing the Halyards & Sail Configuration:
On the Mini-brigs we have used double blocks on each of the top masts. The foremast has two halyards one for the jib and one for the topsail. In the case of the bottom "course yards" these are fixed. Sail is taken in by the use of "bunting lines" with the topsails being lowerable by a halyard.
The double block on the main mast is to facilitate the use of a stay sail. To date we have not added a stay sail in order to keep the boat easy to sail, but it may be added at a future date. You may want to experiment with sail configurations & rigs. This may require adjustment of the standing rigging to your design.
For a real traditional look, you may want to make some rope stropped blocks - you can find information on making those here:
Sail Configurations:
Brigantine (Commonly):
A hermaphrodite brig, or brig-schooner, is a type of two-masted sailing ship which has square sails on the foremast combined with a schooner rig on the mainmast (triangular topsail over a gaff mainsail). As such it has a mix of the two main types of sail plan, hence the term hermaphrodite.
English common usage is to refer to this type of vessel as a brigantine.
Another explanation given by Antony 'Tiger' Timbs, an owner of a brigantine, is, that the correct term for a two-masted vessel with square sails on foremast and fore-and-aft-sails on main mast is anyway 'hermaphrodite brigantine'. A real brigantine also uses square sails on main mast. As the type is so scarce now, the term 'brigantine' was used for the hermaphrodite brigantine, too.
In the late 17th century, the Royal Navy used the term brigantine (often contracted to brig) to refer to small two-masted vessels designed to be rowed as well as to sail, rigged with square sails on both masts. By the first half of the 18th century the word had evolved to refer not to a ship type name, but rather to a particular type of rigging: square rigged on the foremast and fore-and-aft rigged on the mizzen. Many sloops were "brigantine-rigged".
In any event, in the truest sense of the early term, the mini-brigs are brigged rig, with four squares on both mast. Originally, the mini-brig did not carry a gaff or fore and aft sail on the mizzem or main mast. In later years, the Gaff "spanker" driver was added, with a gaff boom, but no lower boom - to avoid being hit. This is known as a loose-footed gaff sail, and is held taught with the aid of a traveller.

Adventures Gaff Rig
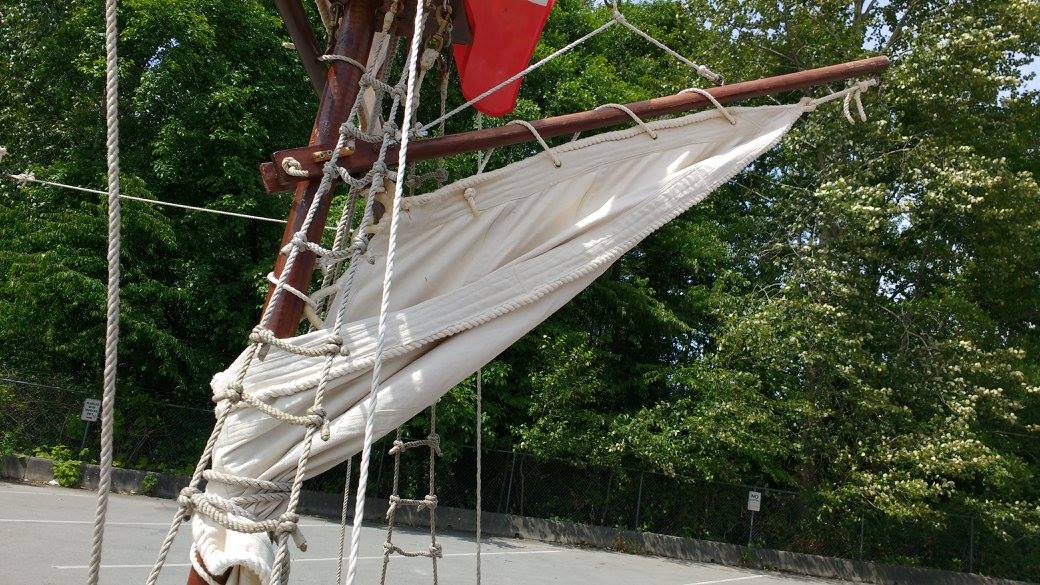
Gaff rig furled
.jpg)


The traveller system for the "loose footed" gaff
Table A: Illustration Of A Brig Versus Brigantine Rig
|
|
|
Brig |
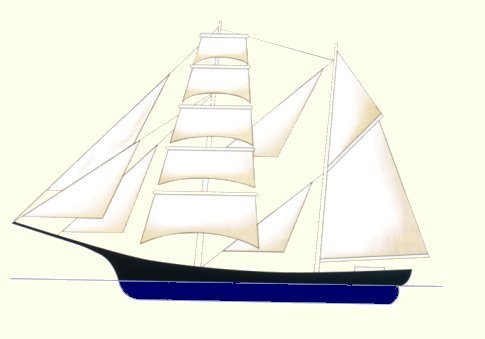 Brigantine |
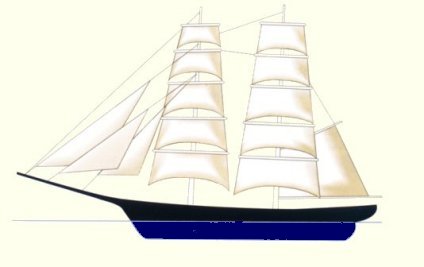
When the brigs were first built, in deciding on the rig type, help with simplicity, and ease of sailing, we kept the "course square" on the main/mizzen mast, but did not add the gaff. A gaff could be added by the use of a small 2nd mast adjacent to the mizzen/main, this was commonly referred to as a "Snow" Brig and is very common in the 18th century. In 2010 we removed the course main, and added the gaff for increased sailing performance. The gaff allows for brig to sail closer to the wind. Although, a traditional square rigger like Nelson's victory could get no closer than 60 degrees to the wind. The mini-brig typically gets no closer than about 50-60 degrees, which means they are difficult - if not impossible to tack through the wind, and often must wear about. In comparison, a modern sail boat, marconi rigged can get anywhere from 90-80 degrees to the wind (much more effecient!).
The "Inspiration" For the Mini-brigs:
In early 2002, the Swedish Navy submarine rescue ship HMS Belos was on a routine exercise* in the middle of the Baltic Sea, when the side scan sonar caught a strange-looking wreck. The on-board ROV Sjöugglan – Swedish for sea owl
– was sent down 100 metres to the bottom.
Despite bad visibility near the bottom, the crew got a spectacular sight on their TV monitors – an old ship standing upright with its two masts standing and bowsprit, perfectly intact. The reason for sinking is a mystery, since both hull and rigging are intact.
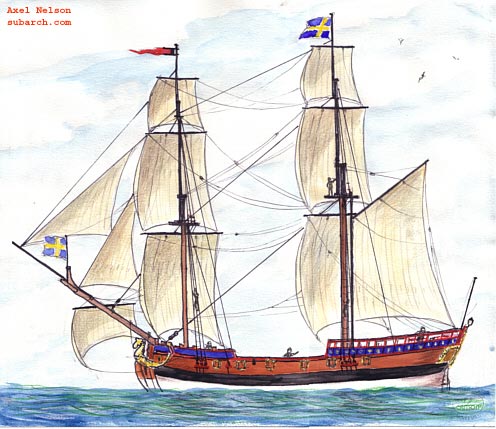
The Mystery "Brig" Found Off The Coast Of Sweden
Optional/Alternate Forms Of Sails :
Basic Lug Sail
Sharpie Sail
.gif)
How The Running Rigging Works:
The Course sails on both masts are attached via a shackle and eye. In the simplest form of the rigging,The yard can rotate around the mast via use of an "iron" u-bolt which passes through the yard. The topsail yards are not fixed, they are able to rotate around the mast, but are pulled up and down the mast via the use of halyards which pass down through a hole in the fighting tops.
In later versions yards are atatched using various methods, such as a swivel pin, and even rope gaskets, etc.
Yards can be rotated around the mast to enable setting to the wind. When running downwind the yards are set perpendicular to the ships center line. When the wind comes from starboard (right) the yards are moved anti-clockwise, comes the wind from port (left) the yards will be moved clockwise. When a ship, due to the force of the wind heels over, the yards are not horizontal resulting in less efficiency. To re-establish maximum efficiency, the yards can be tilted to be set horizontal again
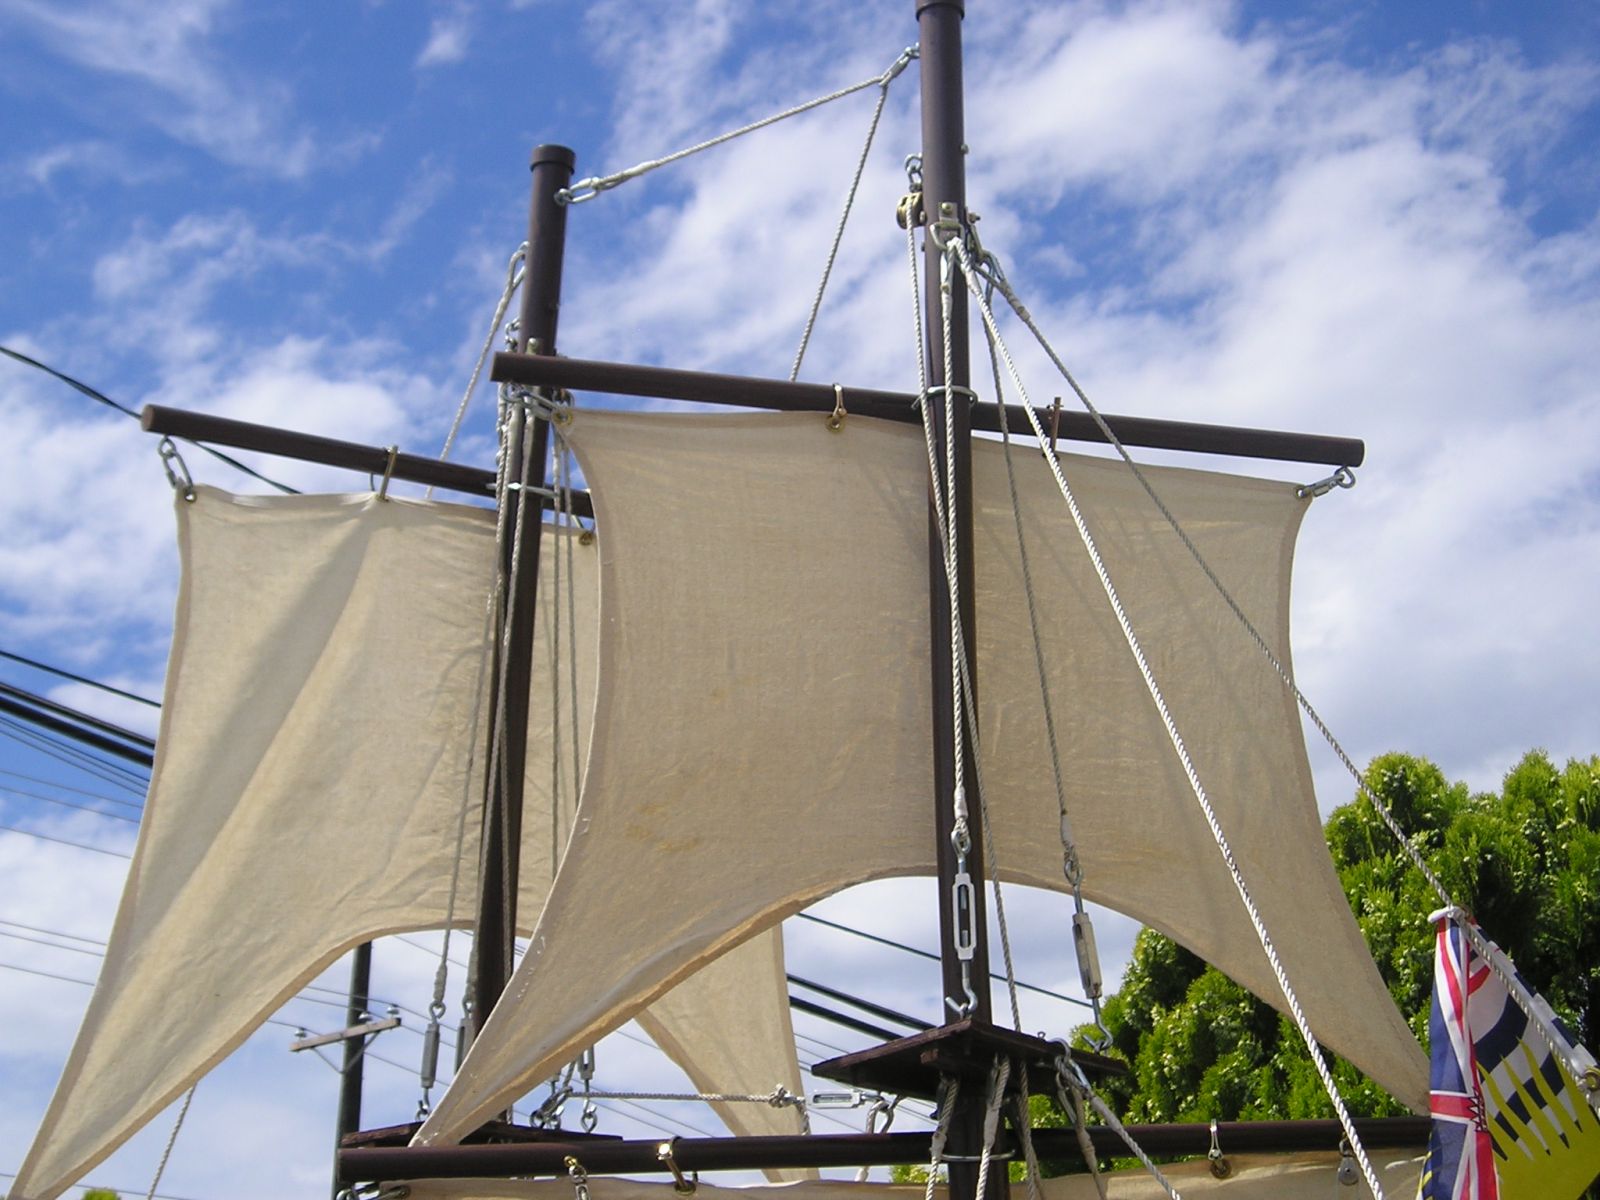
Picture 1: Topsail Layout from the aft.
.JPG)
Picture 2: Course Sail and Topsail Layout From Stern
(Notice bunting lines on the Course Sail)

Picture 3: Mini-brigs Sail Layout From Bow Quarter
Note: Deck Guns In Place
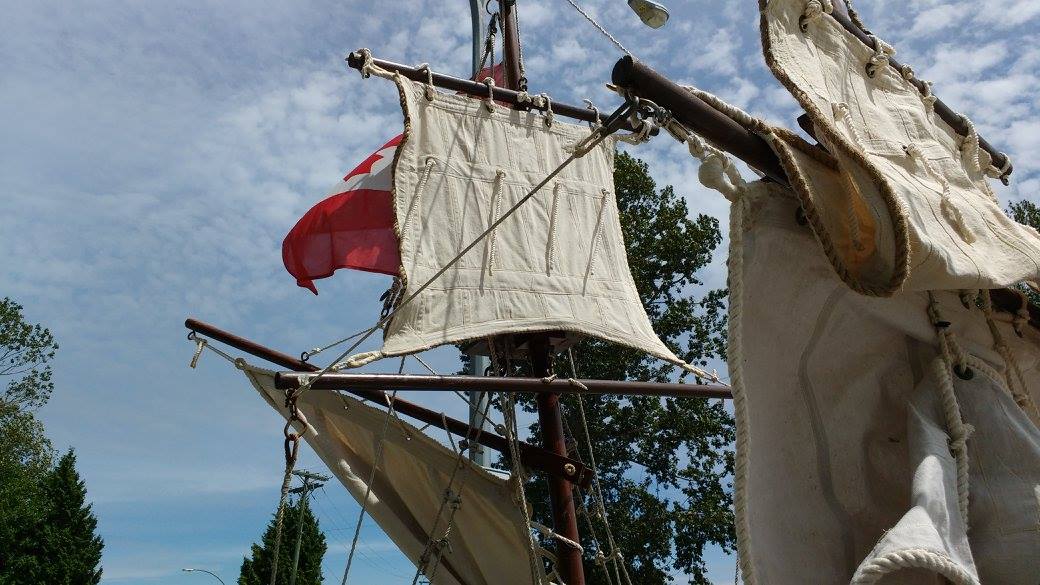
Step 2: Braces and Sheets:
- The Course braces are connected together from each eye on the course yards. This is accomplished by a shackle and small diameter rope with a shackle at the other end. A brace line then comes down from the rear (mizzen) brace and passes through a block, which is then cleated off at a cleat secured at the aft most "plywood plate".
- The main sheets then pass in front of the mizzen shrouds and are cleated off at the second "plywood plate".
- The fore-course sheets then come in aft of the fore-shrouds, and is cleated at the third "plywood plate" from the stern.
- The Jib sheets are cleated off on cleats placed on the outermost part of the crossbrace, two more cleats are placed inside these to allow the jib halyard and topsail halyard to be cleated.
- The sheets & braces are formed by a spliced eye and thimble which is attached to the sail by way of quick links, caribeeners and/or shackles.
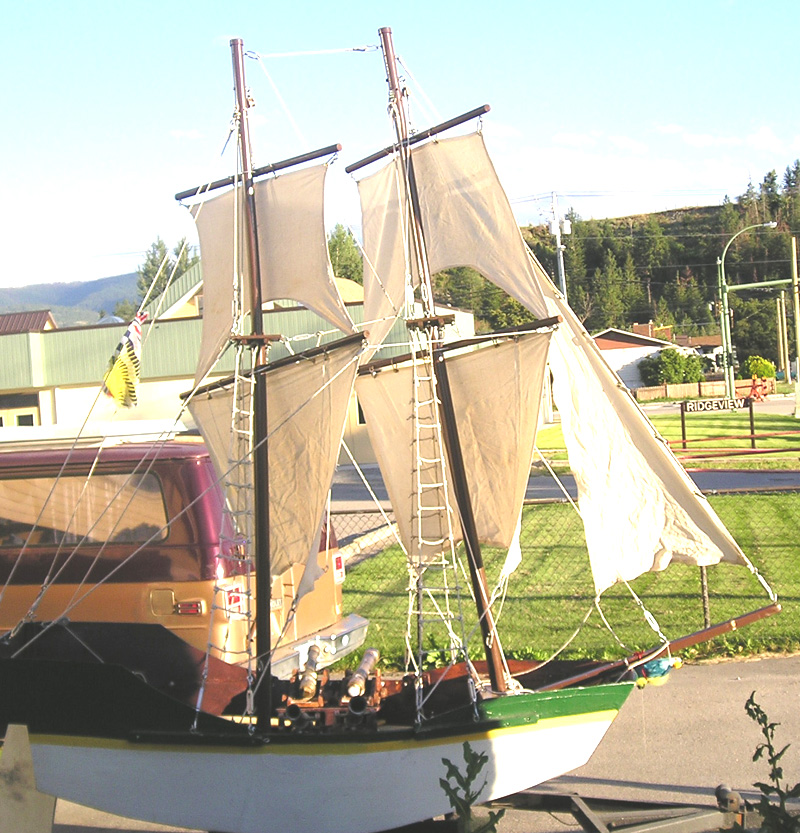
Picture 1: Course Brace Linkages and Sheet Positioning
.jpg)
Picture 2: The Brace Block
|
|
|
Diagram 1: Red Line indicates Course Brace Linkage |
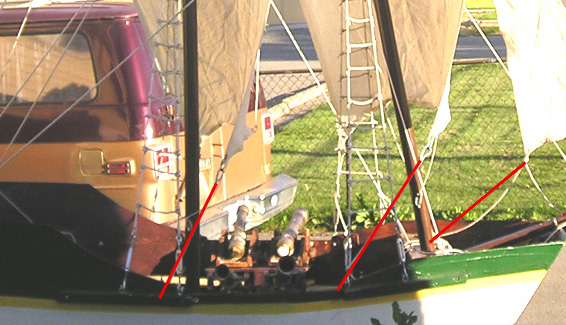 |
| Diagram 2: Red line indicates sheet locations |

Mini-Brig Project: Rigging & Sails: Step 4 - Creating & Sewing The Sails
Step 1: Choosing the sail cloth material:
There are many different types of sail material that can be used. Here is a quick run-down on each:
Polytarp
A very common & popular inexpensive sail. Basically taking a plastic tarp and cutting it up. You can do the "sewing" by using duct or double-sided tape. The advantage of polytarp is the "no sew" method. It is also very resilient to mildew, and doesn't stain. The downside is that polytarp will degrade over time due to UV exposure, so you won't want to leave it on the boat in sunlight for long periods of time. This is a good material for a low budget, and for a "temporary" or experimental sail sail. One other advantage is that polytarp is available in a variety of colours, but most of the colours are very non-traditional and seem somewhat out of character for our boats, for example: orange, silver, blue, green and camoflauge. You can find polytarps in any hardware or surplus store, and even big box store's like Walmart. To find elusive "white" polytarp ,you may have to order online or look at your local surplus store. We found a good source here locally at Princess Auto (http://www.princessauto.com) at a fairly good price, you can get a 20x30ft tarp for $29.99 (CDN). Or they have a two piece kit (8x10 & 10x12), which contains two white tarps for only $8.99.
White Polytarp From Princess Auto
For those not located in Canada, you can also try:
A1- Tarps sells a 6 ounce - 12mil white polytarp in a 12 x 20 size for $31. Note that it is a heavy duty tarp, and UV treated.
Poly-Sail International sells generic white polytarp sail kits. For $104.95 It includes:
- 12 x20 White Polytarp Material
- 42’ x 1 1/2” Double-faced Tape (2 rolls)
- 30″ or more vinyl trim tape
- 50’ x 1/8” Diamond Braided Polyester Reinforcing Rope-420 lb tensile strength
- Sailmaking Instructions
There is a second second option adds a Brass Grommet Setting Kit with (24) 3/8” ID Grommets.
Canvas
Canvas is a very traditional sail, and comes in many weights. For this type of boat you do not need a very heavy weight of cloth. Canvas is very resilient to UV radiation, but is susceptible to wear and tear, and can stretch. It will also wrinkle, and if not stowed properly will mildew if put away wet. Canvas can be dyed or bleached many different colours. You will have to sew canvas, but it is easy to work with. You can get an old sewing machine usually from a Thrift Store such as Value Village or the Salvation Army cheaply. A good source of inexpensive canvas is a painter's dropcloth, this can be had in most hardware stores such as Home Depot very inexpensively. You can get very thick canvas from a surplus store. You can also buy canvas by the yard from your local fabric store. This can be very expensive so be careful. Even in olden times, linen was often used insead of a heavy canvas due to costs, merchant sailing ships and royal navy ships would sometimes have different specifications in regards to weight and type of canvass because of the costs involved. A good heavyweight drop cloth without plastic backing is a great source for "heavy" material. make sure you thoroughly wash, and dry the cloth before cutting or making sails, as it can "shrink".
Canvass is the material that we made the sails for our mini-brigs from. The canvass can be dyed as well, and it is best to do it before sewing sails. The original materials for the "Liberte" was a heavy weight cotton/poly blend, but now she sports dyed canvass. There are many methods for dying, and we will leave it to you to compare processes for natural dyes, versus synthetic dye. One thing to be careful about, is that natural dye "bleed", unless properly fixed. We tried a traditional brine solution, and still had some problems with bleed. It is also a good idea to "dress" or treat the sail to avoid mildew problems.. There are commercial canvass treatments but we prefer traditonal methods. This is commonly referred to as "dressing" the sails. A good article on dressing sails is listed here: http://www.duckworksmagazine.com/03/r/vintage/dressing/sails.htm
Here is more information on dressing and tanning sails from Report of the Commissioner of Fish and Fisheries, United States, 1884:
"As to other methods of protecting sails from mildew I learn that to the use of a dilute aqueous solution of chloride of is sometimes practiced in this vicinity. I was assured by the captain of a sea going schooner that once when a suit of his vessel's sails ruined with mildew he had them dipped with the result that came out white and clean and wore well for three years.
One practice is to spread out the sails of small vessels on a beach and wash them with a mixture of whitewash and brine. Some people appear to plain whitewash. An objection is urged however to the use of lime it tends to rot the canvas and there is probably some risk that in seeking to destroy the mildew fungus with alkalies the growth of forms favorable for putrefaction may be promoted. To quote from Duclaux, ‘Acid liquids are in general more favorable to molds to yeasts and to mycoderms it is only very exceptionally and only en passant that mobile forms are found in them ie vibrios bacteria or monads.
These kinds appear on the contrary by preference in neutral or alkaline liquids where the molds for their part have much trouble to live. The mold Aspergillus for example grows freely on bread moistened with vinegar on the juice of lemon or slices of lemon and on sour fruits and liquors.’
I find a common impression that the sizing in new canvas attracts mildew i.e. that the mildew fungus finds a fit field for its support in the sizing which has been introduced into the interstices of the canvas at the factory.
To avoid this difficulty some owners of vessels prefer to bend their new sails in the autumn in order that the sizing may be worked out of the canvas by the autumn and winter rains at a time that is to say when the weather is too cold for mildew to prosper.
Old sails are said to be comparatively exempt from mildew. The time honored and universal custom of shaking out or hoisting sails in order that they may dry after rain is one familiar method of preservation.
It is precisely because drying is frequently impracticable in some climates that the tanning process is practised. It would be well to study practically whether the method of permanently dyeing sails either with the aid of an alkali or by means of an oil mordant is really an effective means of shielding the canvas from the mildew fungus and it would be of interest to determine whether the altered and oxidized oil that constitutes the mordant in Turkey red dyeing might not of itself help to preserve sails even if no tanning or other coloring substance were combined with it.
This last question could perhaps be answered at once even now by persons who have had experience with the use of Turkey red cloths in damp situations It is not unfair to suppose that the oil mordant might be useful of itself since it would probably tend to keep the sails drier than they would be in its absence and in this way it might be obnoxious to the fungi which need moisture in order that they may thrive.
So too with cordage it might be questioned whether ropes made from hemp that has been impregnated with the oil mordant and tannin instead of with tar would not be specially serviceable in some cases.
Note: Since the foregoing article was written several friends have described to me a method of coloring sails practised in the vicinity of Venice which differs essentially both as to motive and procedure from the processes of tanning and tarring above described. It appears that far from dyeing or tanning their canvas the fishermen at Chioggia merely mix earthy pigments such as burnt sienna and yellow ochre with salt water rub the mixture upon their sails with a sponge let the coating dry in the sun. That is to say they paint the sails water colors and as soon as the paint wears thin they smear on a coating of it. Apparently the purpose of this application nowadays is purely decorative. At all events the practise calls to mind certain historical instances such as the purple sail of Cleopatra's galley already to the fact that Alexander had sails of various colors to the several divisions of his fleet and that the English King Henry 1416 had a sail of purple silk on his particular ship.
But as the Italians it seems not improbable that there may have been use formerly in making the sails dark colored in order the more to escape the observation of the pirates which infested the Mediterranean until a comparatively recent date It is hardly probable earthy pigments applied in the manner above stated can be of much if any use for preserving the sails. On the contrary the question naturally arises may not the earths sometimes actually injure the in the same way that iron rust is known to corrode sails as well other vegetable matters by continually giving up oxygen to them it takes up new oxygen from the air. I remember to have myself met many years ago with American fishermen who were very averse to having any kind of dirt get on their sails because it rotted them. It has been suggested to me that the Italian fishermen may use the pigments in order to close the pores of the canvas so that sails may hold the wind better. But if this be so why do they a process of application that requires to be frequently repeated do they not put on the pigments in such manner that they may stay" -FH Stoerer, Bussey Institute (Harvard University, 1883).
Tyvek
I first heard about Tyvek as a sail-making material from Ron Long a sea-scout master with the 1st Okanagan Seafarer's. Tyvek has its fans. Tyvek is registered trademark of Dupont. It is a spun-bonded polyethylene used for envelopes you can't tear, protective overalls in construction, and "house wrap", a material put under siding to provide a measure of insulating value (it prevents air movement). Also, the sail can be manufactured using a "no-sew" method, with duct or double-sided tape. What the house builder uses is typically ten feet wide. So there will be fewer seams, and in a small sail, no seams at all. In the second place, it doesn't need to be stitched. Wherever one piece of cloth goes over another, like at a seam or a corner reinforcement, it can be stuck together with tape.
As you travel around near where you live, keep your eyes open for a house being built. The odds are that, after the walls have been sheathed with plywood, but before it has been covered with the finishing surface of shingles or clapboard or brick or whatever, it will be covered with looks like white paper. On the paper, in big blue and red letters, are printed “TYVEK” and the DuPont logo. If you can find the foreman, or "the boss" tell him you want to build a sail, and offer to buy some. Chances are you can get it fairly cheaply.
There is a school of thought that as long as your going to use an alternative sail material, you may as well be as overt about it as possible, so go ahead and flaunt the lettering. The main advantage of Tyvek is that it is incredibly cheap if you can find a home builder willing to part with a bit of it. Tyvek sail makers report paying a wide range of prices: nothing, a six-pack, $20, a date with their sister, etc. The main disadvantage of Tyvek is that it loses its shape fairly quickly, stretching out. It also will get brittle over time, and may have problems with extreme temperature changes. Sometimes the strecthing out of the sail is viewed as an advantage, as it provides some shape to the sail not obtainable easily otherwise. Apparently, it also doesn't hold grommets well.
Other downsides, is that you will hate the sound of the sail luffing- it sorts of makes a rattling sound, it doesn't sound like a sail at all. But you will grow accustomed to it, especially as you check your bank balance. If it gets old enough eventually it softens up, to a more sail like material.
Don't attempt to strengthen this sail by running the seams and edges through a sewing machine. The stickum on the tape will gum up the needle immediately. If you really want to sew the seams, make them a lot wider than the tape and sew through the Tyvek, but not through the tape. Any batten pockets you may want should probably be stitched.
The material is rather stretchy. It isn't as bad as the light nylon they use to make sails for boats like a Sunfish, but it is nowhere nearly as inelastic as Dacron. When it is blowing hard the sail will get slightly more full.
Dacron
Dacron sails have been around so long and have proven so successful that this fabric has become the gold standard of sailmaking. Dacron is DuPont's trade name for the fiber polyethylene terephthalate or PET. In the world of sails, though, it has come to mean the generic fabric produced when PET fibers are spun into yarns and woven into sailcloth. By now there are literally hundreds of variations on this theme - different weights and twists of yarn in the warp and in the fill, different weave tightness, and different finishing processes from resin baths to calendaring. PET's advantages include low stretch, high strength, good abrasion and flex tolerance, and low cost. The only real drawback is its long term sensitivity to UV exposure, which weakens the fibers over time. In most cases, UV exposure is the ultimate cause of death for PET sails.
Woven PET sails proved so successful that it was inevitable someone would attempt to use the film version of this molecule in sails. (DuPont's name for PET film is Mylar!). Although the film-only sails were interesting, they had plenty of problems, not the least of which was that any tear, no matter how small, led to catastrophic failure. While woven fabrics were soon laminated to film to stop tears, it eventually became clear that the oriented fibers should do the load carrying, leaving the film as a laminating medium and pressure barrier, rather than the load carrying element in sails.
Dacron is extremely durable, and can be put away weight etc.. with no degradation in quality. The only real drawback to Dacron is the cost of materials. However, there are several ways you can reduce costs. You can go to a flea market or look through classifieds to find old sails, that no longer have a boat to sail on. These sails can be found sometimes very cheaply. You can then "re-cut" them to other specifications. You may also contact your local sail-makers - they may have some seconds, that is sails which don't fit to specification or might have minor flaws. The main thing is that the "used" sail is in good condition.
You can buy Dacron online from commercial suppliers, usually running about $7/yard. You can also get "coloured" and "period" looking Dacron. A great source for small boaters is:
Duckworks Boat Builders Supply:
http://www.duckworksbbs.com/sailmaking.htm
Duckworks Boat Builders Supply
608 Gammenthaler
Harper, TX - USA - 78631

Step 2: Cutting and Sewing:
In making a traditional styled sail, if you are sewing the sail, you will want to make sure you use an extra strong thread, because our sails are smaller, an extremely large diameter thread is not necessary, but a specialty thread is recommended. For example, GÜTERMANN Extra Strong Thread M782, COATS & CLARK Extra Strong 137M-150YD Hemp, or COATS & CLARK Outdoor Thread.
It is also handy to have a set of sail-making tools, regardless of the material, the tools do come in handy. Here's a basic set:
-
Sail needle: a strong needle with a sharp triangular point. You can usually get these sometimes at a dollar store. A good QUALITY darning needle set works wonders, especially with straight and curved needles.

-
Sailmaker’s palm: a strip of leather with a metal pad with an indentation that is used to force the needle through the sailcloth. The strip is strapped around the palm of the hand.

-
Small Pliers: very useful for pulling through a needle inserted into heavy sailcloth or multiple layers of sailcloth.
-
A seam "rubber": a wooden handle with a strong 'scraper', traditionally made from strong lignum vitae (tropical type of wood) for creasing down seams in the edges of the sailcloth. You can use a straight edge, or in a pinch a "wallpaper" roller will also work.

Traditional style seam rubber.
In a pinch, although less "traditional" a wallpaper roller will work.
- Awl, to create a hole in heavy sailcloth or multiple layers of sailcloth before inserting the needle.
-
Marlinspike (also known as a marlingspike): a wooden handle with a piece of metal that tapers to a point in the form of an awl is intended for splicing stranded rope. The marlinspike is inserted between the strands of rope. If the Marlinspike has an eye, a strand is inserted through the hollow section of the marlinspike and is thus fed through the gap in the rope.

-
Hollow punch: a metal pin with a round hole at one end with a sharp edge and a flat face on the opposite end so that it can be hit with a hammer. Hollow punches are available in various sizes and diameters to make small and larger holes. The hollow punches that come in grommet sets can be very handy.

Sewing the Sails
Our first suit of sails that we did for the mini-brigs was done with one solid peice of cloth, that was hemmed, reinforced and grommeted. They work well, and are still usable today, after 12 years of hard service (we did lose a foresail due to mildew problems).
However, in the past few years we have switched over to a more traditional style of sail, which involves putting together the sail in strips, and then sewing in cringles, and ears in each corner, a bolt and footrope. We used beeswax, and all natural materials. Most of the information we used from the Art of Sail Making (1843) which we have attached the .pdf, and also The Elements and Practice of Seamanship (1794): Sail Making Vol. I. In essence, we followed the directions in the Art Of Sail Making, but scaled them to mini-brig format, making accomodations where necessary.
Creating A Basic Sail
Laying out a sail is not much different than laying out a pattern & sewing clothes. It is best to have a large flat working area such a level hard floor surface or a table. Traditionally, sailcloth is supplied in long strips or on a roll. If you want to make a panelled sail, the best way is to draw the outside of the sail on the floor or on the table and then place the roll or strips on top in order to mark them off in roughly equal spacing. For example our topsail is approximately, 9 strips (with the edges half a strip each). The strips are then sewn together until a rough sail shape is obtained. This is then followed by a series of finishing that depends on the location and the function of the sail, and how much time and effort you want to put into it. The original sails we made for the brig, did not have a leech rope. The square sails are finished a little differently than the foresail or gaff sail. In traditional sails, the outside edge of the sail is folded into a hem that is reinforced by sewing a rope upon it. This edge is known as the 'leech'. Loops are added to this rope to attached to the corners of the saiils and that are used for handling and attaching the sail known as "earrings". Reinforced holes (cringles) are made in the sail for securing it to the yard or mast and for reefing the sail (tying down the sail at a higher point in order to reduce the sail area when the wind is blowing hard).
Rather than draw on the our sail cloth directly. We first made a pattern using some brown paper wrap. This is helpful because we have to make two course sails, and two topsails, which are identical. We drew out our plans on the wrap on a large table and using a cardboard box underneath as padding, we took a sharp exacto knife and cut out our sail pattern from the measurements. This step is not much different if you are planning on doing a traditional stripped sail, or using all-in-one piece. You can cut your brown paper into strips and then fit them across the sail that you have drawn out as a whole. If you are panelling yor sail, make sure that each strip has an overlap of approximately 3/4"-1" and depending on the finishing about 2" on the top and bottom (if you plan to add a leeech or bolt rope) If you are drawing it out as a whole, you can either incorporate a 1/2"-1" margin into the pattern or somple cut away from the edge of the pattern by 1/2"-1" for a basic sail, and a little more on the top and bottom if planning on a bolt or leech rope.

This version of Adventure's mini-brig topsail is scaled down from
the Art of Sail Making (1843). It uses stripped panels instead of one piece design.
For both a panelled, and one piece version of the sails, we took the pattern and pinned it on the cloth. We used a sharp pair of sewing scissors to cut out the sail cloth. In the case of the Mini-Brig Adventure, we elected to use canvas as our sail cloth. .
In the case of the panelled sail, we sewed all the panels together in similar fashion to the instructions in both the Art of Sail Making, and The Elements of Seamanship (1794) using a sailors "rolled" hem. This is done by rolling the fabric together, in a single seam, and then pressing it flat with the rubber, we used a few pins to hold it in place and then ran a straight edge along the sim to draw with a pencil a "sew" line for a top stich on the edge of the seam one one side.. The first step is to put a basting stitch to hold the seam together, to do this, we used a sewing machine and set it to the largest straight stitch (spacing between stitches) - we ran it through on one side, then flipped the sail over and did the same on the over edge. Then we ran each edge through the maching with an overlapping zig zag.

A typical stich used to sew the panels together by hand.
(A similar function can be done with a sewing maching
by using a wide space top stich followed by a zig zag setting)
If you prefer to hand sew the sail, mark your sewing line, lay out the sail on a large table with lots of working space. Use a straight stitch to sew the seams: you stitch from A to B and constantly repeat this. If you are right-handed then you work from right to left; if you are left-handed then you go from left to right. Take a large quantity of thread, tie a knot in the end of the thread and insert the other end through the needle. Keep the seam flat in front of you. Work from thin to thick, in other words: push the needle down into the single layer of sailcloth and push it towards the double part of the seam. Push it up again diagonally on the seam approximately 1/8" further along the seam, through two layers of sailcloth. The second stitch is made about 1/2" further along. The trick is to keep an even spacing, so that the stitches are just as long and wide evenly along the seam.
In both sails, you will then want to then reinforce all the outer edges of the seams. Create a hem all the way around once the basic shape of the sail is completed. Do this by laying the sail flat on the table or on the floor. Now fold the edge of the sail to make a hem about 1/2"- 1" depending on the type of finishing you plan to do and make a crease. Force down this crease using a seam-rubber (even a paint scraper can work in a pinch). This is done by rubbing the seam-rubber over the crease a number of times while applying force, in the same way as a paint scraper, so that the crease remains flat on the sailcloth. In the case of the single piece sail, we folded over the edges about 1/2" on all sides, and rubbed and then pinned them in place. You might have to trim the excess in the the corners to form a neat pointed triangle. From there, we ran each edge of the sail in the middle of the seam, through the sewing machine using a straight stitch to tack everything in place.
On the panelled sail, we followed the directions in the Art of Sail Making, and The Elements of Seamanship (1794) and had a larger hem on both the bottom and top of the sail for the bolt and leech rope.
Once all the seams were stitched in place, we then put it back through the machine and used a zig-zag stitch over the top of the original straight stitch. Then ran it back through the machine one more time around the edges of the seam edge using a straight stitch, and then once over again with a zig-zag over the seam edge, to lock the straight stitch in place and keep the inner edges of the seam from fraying.
All-in-all, our seams each had four continuous stitches, two straight stitch and two zig-zag. We then measured up abut a 6" triangular piece to reinforce each of the corners. The four corners of the sails are reinforced by sewing on extra sailcloth to create more layers; up to as many as 2 or 4 layer thickness of sailcloth. These layers are again sewn onto the sail on both sides by using strong specialty thread.
We tacked reinforcements the initial piece in place with a straight stitch around the edges. We then sewed a zig-zag stitch from the corner to the edges in a radiating pattern. For example, we started by running a stitch about a 1/2" from the corner along the far right edge to about 1/2 from the top. Then we sewed another stitch from the corner to about a 1 1/2 inch from the edge, and then from the corner to about 2 1/2 inches, and so on until we reached the far left edge and had about 4-5 stitches running from the corner to the top edge of the triangular patch. Then we ran a zig-zag stitch horizontally about 2 inches apart, up to the top edge.

Corner Reinforcement Stitching Diagram
Depending on the type of sail, and finishing requirements further strips of sailcloth are sewn across the width of the sail in order to secure the reefing lines. Eyelets of the required size are punched into these strips at the required positions using a hole punch and hammer. Grommets for the eyelets are either pressed (metal grommets) or they can be made by rope and sewn onto the eyelets. Short lengths of rope are inserted through these eyelets so that the sail can be reefed (made smaller when the wind is blowing hard). A knot is tied in the end of the rope on each side of the eyelet in order to make sure that the rope remains in place.
In the top hem of the sail you make a series of small holes, which are called eyelets, through which ropes are passed for fastening the sail to the yard. These eyelets are made as follows. Round holes of the required size are punched through the sailcloth at the required positions using a hollow punch and hammer. You can use scissors or a small knife to further snip the holes crossways.
Grommets:
Once you have the sail sewed and reinforcement strips in place, the next step is to insert the grommets into the eyeles. The easiest way is to buy a simple hand tool grommet kit for this project. You simply use a board and hammer to apply the grommets. Ounce you have used the punch tool to create a hole, then insert the grommet and washer. Using the grommet kit and with just a few taps of the hammer, you can affix the grommet to the sail. Grommet kits are available from most hardware & surplus stores.You can get a grommet kit online here:
http://www.profhdwr.com/22350.htm


A simple grommet kit can be had for under $30.00
A more traditional method is to make the grommets out of rope and then sew them to the sail. This is done by unwinding the three strands of a piece of small diameter rope of three strands of approximately a foot long. Make sure that the ends do not unravel. For synthetic rope you do the best way is using an electric rope cutter, which melts the ends of the strands and bonds them together. The ends can also be bonded together using a smaller burner or a lighter. If using a different type of rope that does not melt you bind each end of the stranding using a piece of masking tape. Now take one strand and make a loop of approximately 1"=1 1/2" cross-section in the centre of this. Make sure that both ends are the same length. Now take one of the ends, which you start to twist around the loop in the direction of the end. Insert the end through the loop and make sure that the strand sits neatly in the recesses in the loop. Continue until you have made a complete circle. Now take the other end and twist this around the loop also in the direction of that end. Insert the end through the loop and make sure that the strand sits neatly in the recesses in the loop. Continue until you have made a complete circle. The loop now looks like a circle that has been made from the same thickness of rope from which you have used the three strands. The ends of the two strands can be melted using an electric rope cutter if you are using synthetic rope. For a different type of rope half the thickness of the rope by cutting through half of the strand. Insert the remaining piece into the loop, as a result of which this will become slightly thicker.
The rope grommet is tacked in place using four tack stitches in such a way that the eyelet hole is precisely in the centre of the grommet. The grommet is then sewn up around the eyelet using sail thread. This is done by repeatedly sewing loops over the grommet and through the sailcloth until you have completed an entire circle.

Sewing on a rope grommet
Sewing the bolt/leech rope
All edges of the sail are now reinforced by sewing up with strong rope; these are called the 'leech ropes'. The rope is sewn onto one side of the sail, onto the hem of the sail, approximately 1/2" from the edge. This is done by sewing loops onto one strand of the rope. The thread runs in the same direction as the strand. The next strand is then sewn up further along, and so on. You keep going making sure that the sail is taught.
A few pointers:
1. Keep the rope taut and the canvas slack.
2. Do not bunch the canvas, but hold your needle at such an angle that it goes through the canvas a fraction of an inch ahead of where it comes out from under the strand.
3. Sew each strand to the canvas, making sure theneedle goes under, not through, the strands.
4. Do not let your stitches start to creep up aroundthe rope, but keep them coming out of the rope in astraight line along the underside. If you let them creep,the canvas begins to curl around the rope.
5. SEW THE BOLT ROPE TIGHT.

Sewing the bolt/leech rope

An image of bolt rope sewn onto the sail
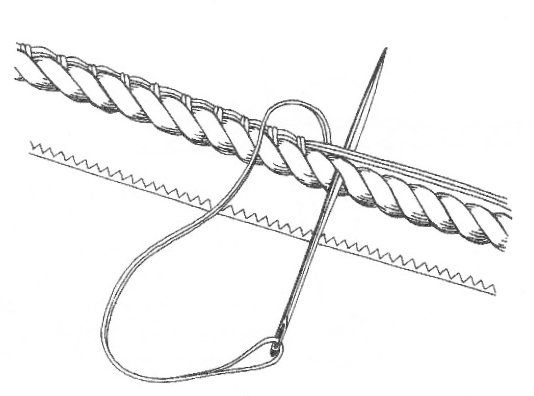
In sewing he bolt/leech rope, you may also want to make eyes for the tack and clew and for the sheets to attach. This is done by looping the rope to form an eye, often referred to as an earring. On all our eyes, we whipped them with a layer of sail thread and then coated them with beeswax to prevent against chafing
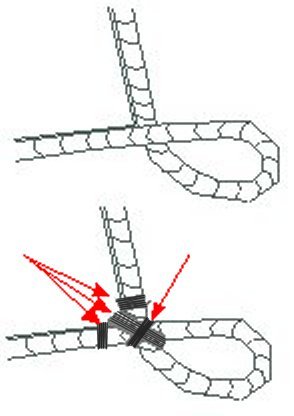
An example of an earring loop and attachment
to the corner of the sail.

A general diagram of how the leech/bolt rope is sewn around the sail
Cringles
Depending on the sail type, you make also need to add cringles for attaching the sail to the mast or yard arm, and for reefing - for travel or in extreme weather. The Gaff sail is attached to the yard with cringles. There are different methods to make cringles, but the most common is to splice them into the leech rope.

Attaching The Sails To The Yards:
Method #1: Rope Robbands
Attaching the sail to the yard is known as "bending" the sail. There are several methods to used to attch the sail to the yards. The square sails were attached to the yards before 1800 by lacing robbands which were threaded through eyelets in the top edge of the sail and wound around the yard, the sail thus hanging underneath the centre line of the yard. Early in the 1800's jackstays were introduced, made by screwing eyebolts along the top of the yard and threading a rope through them from each end and lashing them together tightly in the middle. The sail robbands were laced to this rope with the sail then hanging over the front of the yard. The rope jackstay eventually became a solid iron rod as on modern sailing ship. Our current sails are attchached using rope robands which are tied onto the yard, using a simple reef knot.
.jpg)
There is a range of methods of "bending" the sail to the yard.
The simplest is to use metal hoops or irons used after the middle of the 19th century
.jpg)
Mini-Brig with sails bent to yard with rope robbands

Square yards With robbands

Adventure with Robbands

Liberte sports her robbands
METHOD #2 - Metal Hoops
The easy and simple method of attaching the sail is to use iron "rings" which replaced the robbands by the mid 19th century. We used this method when we first built the brigs, but then in later variations have switched to rope robbands.

By the mid 19th century, sails were bent to the yards with iron hoops.
When we first built the mini-brigs, we opted to use a simple brass hoop method of bending the sails to the yards. This was accomplished by using a brass locking pin.

The Sails are attached to the yards via the use of brass locking pins. Each sail has two locking pins that pass through the grommets. The clew of each sail is attached to the yard via quick links. You can attach the sheets and braces using shackles, quick links, or caribeeners. In our case we found a good sale on quick links. This take more time to set-up but on sale they were inexpensive, and they are very secure.
Picture 1: Brass Locking Pin

Picture 2: Brass Locking Pin On Yard
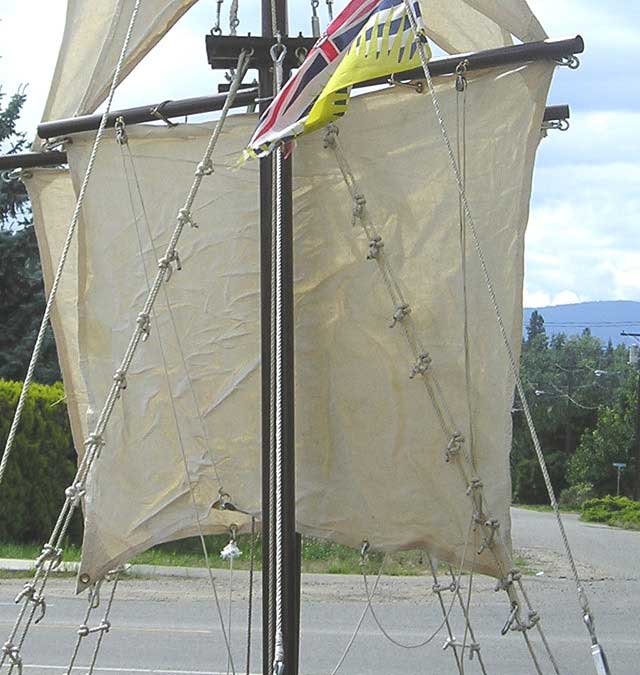
Picture 3: A simple one piece course sail with metal irons attching it to the yard
Bunting Lines:
The course sail has bunting lines which allow you to reduce windage when motoring into the wind or to take in sail in a real blower. The bunting lines are simple 3/8" chord that runs through a small swivel block attached to the yard via a brass hook. Hang the swivel block on the hook, and close the hook with a pair of pliers. The ends of the bunting lines are attached to a shackle via the use of a bowline knot.
The bunting lines are then cleated off on small cleats located on each side of the mast.
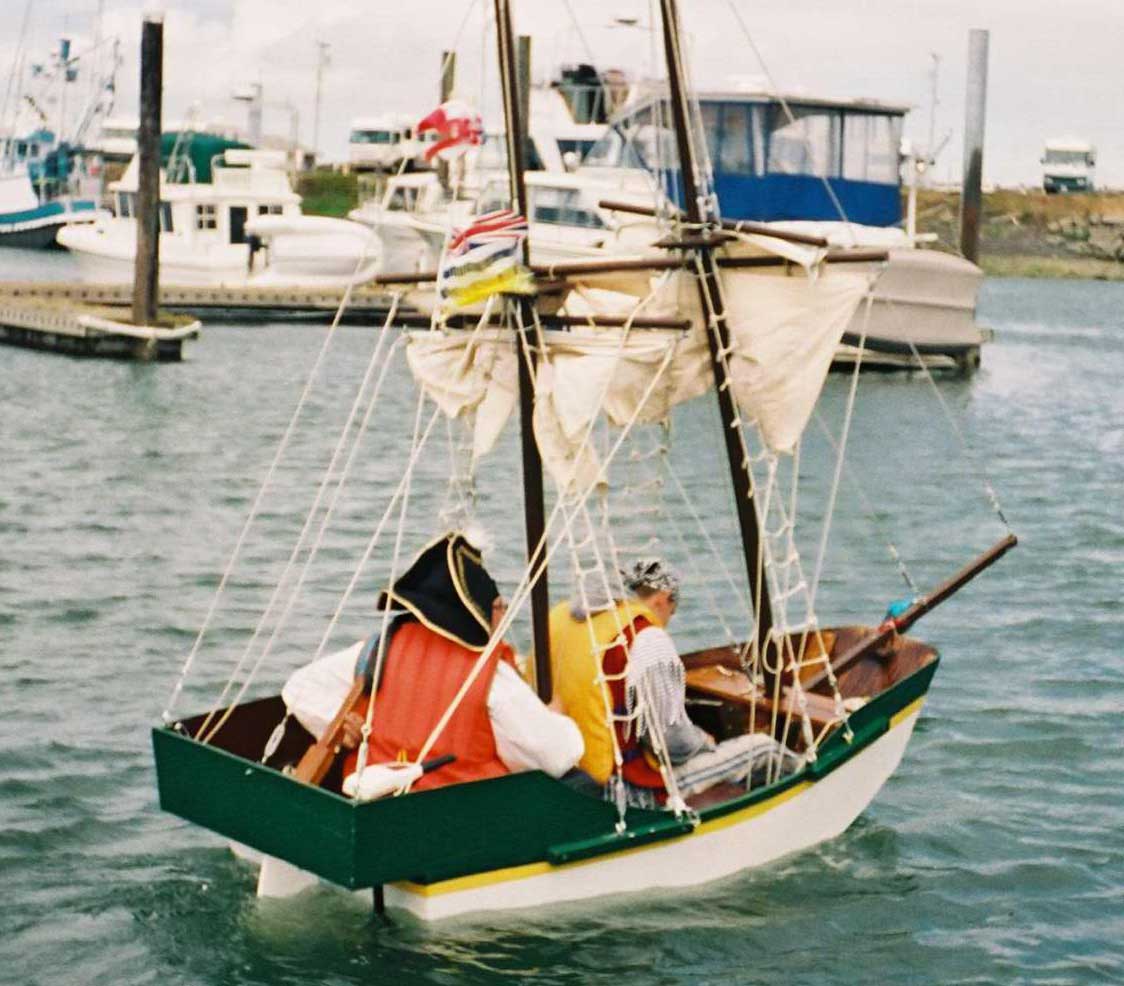
Motoring with the Top Sails Down and Course Sails Taken-In
Attaching the Foresail
Traditionally, the foresail was bent on to the forestay by lacing with a running rope. In the later have of the 18th century, it was attached by using "hanks" which are sort pieces of iron that are bent into a hoops and then closed off with twin. In the mini-brigs we use simple metal shackes as hanks to attach the sail to the forestay.

Traditional methods of attaching the hank
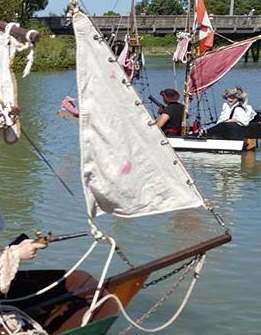
Jib foresail on Adventure
Attaching the Gaff:
The gaff sail is attached to the mast by using spiral lacing. The gaff could also be attached using mast hoops, but with such a small boat, the lacing is quick and easy. There are different types of spiral lacing that can be used, but in this case we use the most simple and traditional style.

Simple method of correctly lacing the gaff sail to the mast

Lacing a gaff sail to a mast


There are many different techniques


.jpg)
| Attachment | Size |
|---|---|
| The_art_of_sail_making.pdf | 8.61 MB |
Mini-Brig Project: Finishing Touches
Finishing Touches:
By now you will want to put on all the finishing touches, that is apply all the cleats and hardware. There are many different ways of cleating lines, from cam-cleats, to pins. We opted for stainless steel cleats and some hand made wooden cleats.There is much discussion about various hardware and we encourage you to explore and find what is right for you.
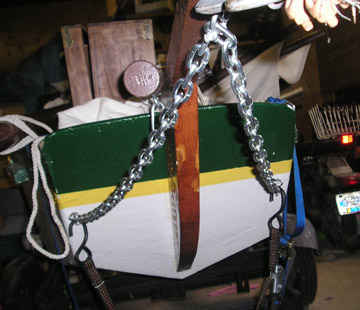 You may also want to head a figurehead or some decorative touches. We will leave that up to you. Our brig originally had a temporary figurehead earned during a trip down to Westport Washington. But that is another story. It now sports a figurehead of St. Brendan's Cross... .
The mini-brig is an ongoing project, and we will be adding features and making modifications as time permits. For example, a second headsail and staysail is in the works. Over the years, we have changed sail configurations, and "upgraded" to more traditional styles of sails.Both of the mini-brigs have full length keels that have been added, in hopes of increasing sailing abilities.
 We hope that your Mini-Brig will bring you hours of enjoyment. As always, please excersize caution while on the water and always wear your PFD.
While we encourage you to make it your own, We ask that you give reference to where the idea originated - The Shady Isle Pirates, and it was designed by Brian Nix.
Fair winds, and good Sailing.
Brian